
Draining a radiator is a controlled maintenance process that isolates a radiator from the heating circuit, releases internal pressure, and removes the full water volume so mechanical work, contamination control, or leak isolation can occur without uncontrolled discharge or system imbalance. A standard radiator contains 3–7 litres of water, and draining replaces water with air, which requires preparation, valve isolation, pressure awareness, and correct refilling to maintain stable operation.
Radiator draining becomes necessary when bleeding does not resolve cold spots, when valves or radiators require replacement, when sludge and magnetite restrict internal flow, or when leaks demand hydraulic isolation. The process involves room protection, system shutdown, pressure stabilisation, controlled water release, and post-drain bleeding and pressure normalisation, with technique varying by radiator type, valve condition, and internal contamination level. Draining time typically ranges from 10 to 30 minutes per radiator, depending on size, blockage, and discharge control.
Professional radiator draining generally costs £60–£90 for a single radiator as a standalone task, reflecting labour time and pressure reinstatement. Costs increase to £120–£150 when valves are seized, access is restricted, or contamination slows drainage, and commonly reach £100–£200 when draining is combined with radiator removal, refitting, or valve replacement. Emergency or out-of-hours attendance increases costs further. Correct draining, refilling, leak checking, and ongoing maintenance reduce repeat interventions, protect system pressure, and preserve long-term heating performance.
What Does It Mean to Drain a Radiator?
Draining a radiator means removing all water from a central-heating radiator by isolating the radiator from the heating circuit and releasing stored water through radiator valves to enable maintenance, replacement, or internal cleaning.
Radiator draining represents a controlled hydraulic isolation process performed using thermostatic radiator valves, lockshield valves, and bleed valves. A standard steel panel radiator contains 3–7 litres of water depending on width, height, and convection fin density, so complete water removal prevents leakage, pressure imbalance, and internal corrosion during radiator work.
Why Would You Need to Drain a Radiator?
Draining a radiator is required to remove stored water before physical or hydraulic intervention, because retained water causes uncontrolled discharge, joint failure, pressure loss, and material exposure during radiator-level maintenance within a closed central-heating circuit.
Valve Replacement Preparation
Draining a radiator is required before replacing thermostatic or lockshield valves because valve removal from a water-filled radiator releases between 3 and 7 litres of pressurised water, increasing the risk of leakage and compression joint deformation. Water evacuation eliminates hydraulic force at threaded unions and olives, allowing controlled valve removal without fluid escape.
Radiator Removal and Handling Safety
Draining a radiator is required before radiator removal because a filled steel panel radiator weighs between 15 and 40 kilograms depending on panel size and water volume, increasing manual handling risk and causing uncontrolled spillage during bracket disengagement. Removing internal water mass reduces lifting load and prevents discharge from exposed radiator tails.
Sludge and Contamination Management
Draining a radiator is necessary for sludge cleaning because iron oxide and magnetite particles settle at the radiator base, and full water evacuation enables effective flushing of particulate layers measuring 0.5–2.0 millimetres. Internal contamination reduces flow velocity and lowers radiator heat output by up to 15 percent when deposits remain untreated.
Leak Isolation and Damage Control
Draining a radiator is required to isolate leaks because continuous water flow through valve threads or pinhole corrosion releases measurable volume loss exceeding 0.1 litres per minute under normal operating pressure. Water isolation limits corrosion progression and surface damage to surrounding finishes.
Heating Circuit Pressure Stability
Draining a radiator preserves heating circuit pressure because controlled localised water removal prevents pressure drops below standard operating ranges during maintenance activity. Targeted draining maintains hydraulic balance across remaining radiators and circulation pathways without system-wide depressurisation.
How Do You Know If a Radiator Needs Draining Rather Than Bleeding?
A radiator needs draining rather than bleeding when performance problems originate from water contamination, hydraulic imbalance, or component replacement instead of trapped air, because bleeding removes air only while draining removes water, debris, and pressure from the radiator circuit.
Indicators That Bleeding Is Not Sufficient
Bleeding is insufficient when heat output remains uneven after air release, because trapped air correction does not resolve sludge accumulation, valve faults, or internal blockages. The indicators of insufficient bleeding are given below:
- Cold lower panels: Magnetite settlement at the radiator base restricts convection flow despite air removal.
- Brown or black bleed water: Oxidised iron particles indicate sludge presence exceeding normal dissolved limits.
- No air release during bleeding: Absence of air discharge confirms water-filled conditions without compressible gas pockets.
Indicators That Draining Is Required
Draining is required when mechanical work or internal contamination exists, because water-filled radiators retain mass, pressure, and debris that bleeding does not remove. The indicators that draining is required are given below:
- Valve replacement or radiator removal planned: Pressurised water volume of 3–7 litres per radiator necessitates isolation and evacuation.
- Persistent cold zones after repeated bleeding: Flow obstruction from particulate layers measuring 0.5–2.0 millimetres requires water removal and flushing.
- Active leakage at valves or joints: Continuous discharge exceeding 0.1 litres per minute requires hydraulic isolation.
Functional Difference Between Bleeding and Draining
Bleeding releases trapped air from the upper radiator chamber, while draining removes the entire water volume and internal contaminants from the radiator body. Bleeding restores circulation efficiency affected by compressible gases, whereas draining enables maintenance, cleaning, and component replacement by eliminating hydraulic pressure and water mass.
Do You Need to Drain the Whole Heating System or Just One Radiator?

Draining a single radiator is sufficient for localised maintenance such as valve replacement, radiator removal, or minor leak repair, while draining the whole heating system is required only when system-wide work affects pipework, boiler components, or circulating water quality.
Draining One Radiator
Draining one radiator is appropriate when work targets a single heat emitter, because isolation valves allow hydraulic separation without depressurising the entire circuit. A standard panel radiator contains 3–7 litres of water, and isolating thermostatic and lockshield valves confines water release to the selected radiator only, preserving overall circuit pressure.
Draining the Whole Heating System
Draining the whole heating system is required when work involves pipe alterations, power flushing, boiler replacement, or widespread contamination, because water circulation connects all radiators and components hydraulically. System draining removes the full water volume, typically 80–150 litres in a domestic installation, enabling uniform cleaning, refilling, and pressure rebalancing.
How to Decide Between Local and Full Draining
The decision depends on work scope and contamination extent, because localised faults remain isolated while systemic faults propagate through shared pipework. Single-radiator draining suits mechanical component changes, whereas full-system draining suits sludge removal, pipe reconfiguration, or heat-source replacement.
What Tools and Equipment Do You Need to Drain a Radiator?
Draining a radiator requires basic plumbing tools that allow controlled water release, valve isolation, and spill management, because radiator draining involves removing 3–7 litres of water under residual system pressure from a closed heating circuit.
Essential Tools for Draining a Radiator
The essential tools for draining a radiator are items that control water flow, capture discharged water, and loosen compression fittings. The required tools are given below:
- Radiator bleed key: Opens the bleed valve to admit air and release water gradually.
- Adjustable spanner: Loosens valve union nuts and compression fittings sized between 15–22 millimetres.
- Lockshield valve cap or grips: Turns the lockshield spindle to fully closed position for hydraulic isolation.
- Drain-off hose or flexible tube: Directs discharged water into a container or external drain point.
- Bucket or tray: Collects discharged water volume ranging from 3–7 litres per radiator.
Protective and Support Equipment
Protective equipment is required to prevent surface damage and contamination during radiator draining, because heating water contains iron oxide and corrosion residues. The supporting equipment is given below:
- Absorbent cloths or towels: Capture residual drips at valve joints and bleed points.
- Dust sheets or floor covers: Protect flooring and finishes from staining caused by magnetite particles.
- Gloves: Prevent skin contact with contaminated heating water containing suspended metal particles.
Optional Equipment for Controlled Drainage
Optional equipment improves drainage control and cleanliness during radiator draining, especially when repeated maintenance is planned. The optional items are given below:
- Radiator valve drain adaptor: Enables hose connection directly to valve tails for continuous discharge.
- Spirit level: Confirms radiator tilt to direct remaining water toward the drain point.
- Torch: Improves visibility at valve joints and bleed screws during low-light conditions.
How Do You Prepare Your Room Before Draining a Radiator?
Preparing a room before draining a radiator involves protecting surfaces, creating drainage access, and clearing the working area to control the release of 3–7 litres of heating water and prevent staining, slip risk, and fixture damage during radiator isolation.
Surface and Floor Protection
Surface protection prevents permanent staining from heating water containing iron oxide and magnetite particles. The preparation steps for surface protection are given below:
- Cover flooring: Place absorbent dust sheets or waterproof mats beneath the radiator footprint and valve positions.
- Shield walls and skirting: Position towels or cloths behind valve connections to intercept splashes.
- Protect nearby furniture: Move furniture at least 1 metre away from the radiator work zone.
Drainage and Access Preparation
Drainage preparation ensures controlled water removal and uninterrupted workflow during radiator draining. The preparation steps for drainage and access are given below:
- Position a collection container: Place a bucket or tray with minimum 10-litre capacity below the lowest valve point.
- Clear valve access: Remove radiator covers, valve caps, and obstructions around thermostatic and lockshield valves.
- Ensure lighting visibility: Provide direct light to valve unions and bleed points to avoid joint damage.
Safety and Contamination Control
Safety preparation reduces slip hazards and limits contamination spread from discharged heating water. The safety measures are given below:
- Wear protective gloves: Prevent skin contact with contaminated system water.
- Maintain clear walkways: Keep the surrounding floor area free from tools and loose materials.
- Prepare absorbent materials: Keep spare cloths available to manage residual drips during valve loosening.
What Safety Precautions Should You Take Before Draining a Radiator?

Safety precautions before draining a radiator involve isolating heat sources, stabilising system pressure, and preventing exposure to hot or contaminated water, because radiator draining releases stored water mass and residual pressure from a closed heating circuit.
Heat and Pressure Isolation
Heat and pressure isolation prevents scalding and uncontrolled discharge during radiator draining. The required precautions are given below:
- Switch off the heating system: Allow water temperature to fall below 30 °C to eliminate burn risk.
- Allow pressure stabilisation: Wait until circulating pumps stop and pressure equalises within the pipework.
- Close radiator valves fully: Shut thermostatic and lockshield valves to isolate the radiator hydraulically.
Personal Safety Measures
Personal safety measures reduce injury risk from contaminated heating water and manual handling. The required measures are given below:
- Wear protective gloves: Prevent skin contact with heating water containing iron oxide and corrosion by-products.
- Use eye protection: Reduce splash exposure risk when opening bleed valves or loosening unions.
- Adopt stable posture: Maintain balanced footing to prevent slips when handling water containers.
Property and Environmental Protection
Property protection prevents damage caused by water discharge and staining residues. The required precautions are given below:
- Protect floors and finishes: Use absorbent coverings beneath valves and bleed points.
- Prepare adequate containers: Use buckets exceeding 10-litre capacity to manage discharge volume safely.
- Keep tools organised: Maintain clear access routes to avoid trip hazards during the draining process.
Applying these safety precautions reduces thermal risk, controls water release, and protects surrounding surfaces while maintaining stable working conditions during radiator draining.
How Do You Drain a Radiator Step by Step?
Draining a radiator requires a strict procedural sequence that isolates the radiator, neutralises residual pressure, and removes the complete internal water volume safely, because a standard panel radiator contains between 3 and 7 litres of water held within a pressurised heating circuit.
Step 1: Switch Off the Heating System
Switching off the heating system stops water circulation and allows water temperature to fall below 30 °C, reducing scald risk and pressure fluctuation during radiator draining. Circulation pumps must fully stop before valve interaction begins.
Step 2: Allow System Pressure to Stabilise
Allowing system pressure to stabilise prevents sudden discharge when valves are opened, because pressurised water expands when circulation ceases. A waiting period of 20–30 minutes equalises internal hydraulic forces.
Step 3: Fully Close the Thermostatic Radiator Valve
Closing the thermostatic radiator valve isolates the radiator flow inlet and prevents additional water entry during draining. Clockwise rotation continues until mechanical resistance confirms full closure.
Step 4: Fully Close the Lockshield Valve
Closing the lockshield valve isolates the radiator return path, completing hydraulic separation from the heating circuit. Lockshield spindles require clockwise rotation using a spanner or grips to reach the closed position.
Step 5: Position Water Containment and Protection
Positioning containment controls discharged water volume and prevents surface contamination from magnetite-rich heating water. A minimum 10-litre container must sit below the lowest valve joint, with absorbent protection beneath the radiator footprint.
Step 6: Open the Radiator Bleed Valve
Opening the bleed valve allows air entry into the radiator, breaking internal vacuum and enabling consistent water flow during draining. Gradual bleed screw rotation prevents sudden pressure release.
Step 7: Loosen the Valve Union Nut Slowly
Loosening the valve union nut initiates controlled water release once air entry is established. Incremental loosening avoids joint distortion and directs water flow into the prepared container.
Step 8: Monitor and Regulate Water Discharge
Monitoring discharge rate maintains control over water flow and prevents overflow, because residual pressure varies between systems. Union nut adjustment regulates flow speed without fully disengaging fittings.
Step 9: Tilt the Radiator to Remove Residual Water
Tilting the radiator toward the open valve evacuates trapped water from internal channels and lower convection paths. This action removes remaining water that gravity alone does not discharge.
Step 10: Confirm Complete Drainage
Confirming complete drainage ensures no remaining water mass remains inside the radiator before maintenance begins. Absence of water flow and audible air entry indicate full evacuation.
Step 11: Retighten Valve Connections
Retightening valve connections prevents accidental spillage and air ingress after draining completes. Union nuts and bleed screws must reach firm resistance without overtightening.
Step 12: Maintain Radiator Isolation
Maintaining radiator isolation preserves system pressure balance while work proceeds. Both valves remain closed until refilling or reinstallation occurs.
Completing all steps removes hydraulic pressure, water mass, and internal contamination pathways, preparing the radiator for safe maintenance, removal, or cleaning without disrupting the remaining heating circuit.
How Do You Drain a Radiator Without a Drain Valve?
Draining a radiator without a drain valve requires isolating the radiator and releasing stored water through the valve union connection, because the radiator body contains 3–7 litres of water that exits once hydraulic pressure and vacuum are neutralised.
Step 1: Shut Down Heat and Circulation
Shutting down heat and circulation reduces water temperature below 30 °C and halts internal flow, preventing scalding and pressure fluctuation during manual drainage. Circulation pumps must stop completely before valve handling begins.
Step 2: Allow Internal Pressure to Equalise
Allowing internal pressure to equalise stabilises water movement inside the pipework and prevents sudden discharge at the valve union. A waiting period of 20–30 minutes achieves hydraulic balance.
Step 3: Close the Thermostatic Radiator Valve
Closing the thermostatic radiator valve isolates the inlet side of the radiator and blocks incoming water during drainage. Full clockwise rotation until mechanical resistance confirms isolation.
Step 4: Close the Lockshield Valve
Closing the lockshield valve isolates the return side of the radiator and completes hydraulic separation from the heating circuit. Clockwise rotation using a spanner or grips seals the return path.
Step 5: Prepare Water Containment
Preparing water containment prevents surface damage and overflow during drainage through the valve union. A container exceeding 10 litres must sit directly beneath the valve connection, with absorbent protection covering surrounding surfaces.
Step 6: Open the Radiator Bleed Valve
Opening the bleed valve introduces air into the radiator, breaking internal vacuum and enabling gravity-driven water release. Gradual rotation prevents pressure shock.
Step 7: Loosen the Valve Union Nut
Loosening the valve union nut initiates water discharge when no drain valve exists. Controlled incremental loosening releases water through the joint without disengaging the fitting.
Step 8: Regulate Flow Through the Union
Regulating flow through the union prevents uncontrolled discharge, because residual pressure varies between heating systems. Partial tightening or loosening adjusts discharge rate.
Step 9: Tilt the Radiator Toward the Open Valve
Tilting the radiator toward the open valve evacuates residual water trapped in lower internal channels. This action removes remaining water mass that gravity alone does not release.
Step 10: Confirm Full Water Removal
Confirming full water removal ensures safe mechanical work without leakage risk. Continuous air entry and absence of water flow indicate complete drainage.
Step 11: Reseal the Valve Connection
Resealing the valve connection prevents air ingress and accidental spillage once drainage finishes. The union nut and bleed valve must return to a fully closed position.
Step 12: Maintain Isolation During Maintenance
Maintaining isolation preserves system pressure balance while radiator work proceeds. Both radiator valves remain closed until refilling and re-pressurisation occur.
How Do You Drain a Radiator for Removal or Replacement?
Draining a radiator for removal or replacement requires full hydraulic isolation, complete water evacuation, and controlled disconnection of mechanical fixings, because a filled radiator contains 3–7 litres of water and applies load and pressure at valve unions and wall brackets.
Step 1: Shut Down Heat and Circulation
Shutting down heat and circulation stops water movement and reduces internal water temperature below 30 °C, eliminating scald risk and pressure variation during radiator removal. Circulation pumps must cease operation before any valve interaction.
Step 2: Allow Pressure and Temperature to Stabilise
Allowing pressure and temperature to stabilise prevents sudden discharge during disconnection, because residual expansion remains inside the radiator after shutdown. A stabilisation period of 20–30 minutes equalises internal forces.
Step 3: Isolate the Radiator Using Both Valves
Isolating the radiator using both valves prevents fresh water entry and return flow during drainage. The thermostatic radiator valve and lockshield valve require full clockwise closure to create complete hydraulic separation.
Step 4: Prepare Water Containment and Surface Protection
Preparing containment and protection controls discharged water and prevents surface contamination from magnetite-rich heating water. A container exceeding 10 litres must be positioned beneath the lowest valve joint, with absorbent protection beneath and behind the radiator.
Step 5: Open the Bleed Valve to Admit Air
Opening the bleed valve introduces air into the radiator, breaking vacuum conditions and enabling consistent gravity-driven drainage. Gradual bleed screw rotation prevents pressure shock.
Step 6: Loosen the First Valve Union
Loosening the first valve union initiates controlled water release from the radiator body. Incremental loosening regulates flow rate and prevents compression joint deformation.
Step 7: Drain the Full Internal Water Volume
Draining the full internal water volume requires steady discharge until water flow ceases and audible air intake occurs. This confirms evacuation of the primary water mass.
Step 8: Tilt the Radiator to Release Residual Water
Tilting the radiator toward the open valve removes residual water trapped in lower internal channels and convection paths. This step eliminates remaining water mass that gravity alone does not release.
Step 9: Disconnect the Second Valve Union
Disconnecting the second valve union completes radiator separation once water removal finishes. Controlled disconnection prevents secondary spillage from trapped valve-side water.
Step 10: Lift the Radiator Clear of Wall Brackets
Lifting the radiator clear of wall brackets allows full removal without load imbalance or spillage. A drained radiator weighs significantly less than a filled unit, reducing handling risk.
Step 11: Seal Valves and Secure Open Pipe Ends
Sealing valves and pipe ends prevents air ingress and accidental discharge during the replacement period. Valve caps or temporary blanking fittings maintain circuit integrity.
How Long Does It Take to Drain a Radiator?
Draining a radiator typically takes between 10 and 30 minutes, because internal water volume, radiator size, valve restriction, and residual pressure determine the controlled discharge rate from a closed heating circuit.
Radiator Size and Water Volume
Radiator size directly affects draining time because larger radiators contain greater internal water volumes. Single-panel radiators generally hold 3–4 litres and drain within 10–15 minutes, while double-panel radiators hold 5–7 litres and require 20–30 minutes for complete evacuation.
Valve Condition and Flow Restriction
Valve condition influences draining duration because partially restricted valve unions reduce discharge rate. Aged compression fittings and narrow valve apertures slow water release and extend draining time.
Internal Contamination and Sludge
Internal contamination increases draining time because magnetite and iron oxide deposits reduce effective internal flow paths. Sludge layers measuring 0.5–2.0 millimetres prolong discharge by limiting gravity-driven flow.
Residual System Pressure
Residual system pressure affects drainage speed because pressure imbalance alters water release behaviour. Allowing 20–30 minutes for pressure stabilisation before draining shortens active discharge time and improves flow control.
What Common Problems Can Occur When Draining a Radiator?
Common problems during radiator draining arise from incomplete isolation, unstable pressure conditions, joint disturbance, and internal contamination, because a radiator contains pressurised water, suspended corrosion by-products, and mechanical valve interfaces that respond predictably when disturbed.
Uncontrolled Water Release
Uncontrolled water release occurs when radiator valves remain partially open or internal pressure has not stabilised, causing rapid discharge of 3–7 litres of water through loosened unions. Sudden flow overwhelms containment capacity and increases flood and surface damage risk.
Incomplete Radiator Isolation
Incomplete radiator isolation occurs when thermostatic or lockshield valves fail to close fully, allowing continuous water ingress during draining. Worn valve seats and seized spindles prevent effective hydraulic separation.
Compression Joint Leakage After Reassembly
Compression joint leakage occurs after draining when olives shift or deform during loosening and retightening. Distorted compression fittings fail to reseal under operating pressure, producing slow seepage following refilling.
Air Ingress and Circuit Airlocks
Air ingress occurs during draining when uncontrolled air entry displaces water unevenly, forming airlocks within connected pipework. Airlocks reduce circulation efficiency and cause uneven radiator heating after refilling.
Sludge and Contaminant Discharge
Sludge discharge occurs when magnetite and iron oxide deposits mobilise during water release, staining surfaces and obstructing valve apertures. Heating water commonly contains particulate debris measuring 0.5–2.0 millimetres.
Residual Water Retention
Residual water retention occurs when radiator geometry or mounting angle prevents gravity from evacuating all internal channels. Trapped water increases spillage risk during removal or replacement.
System Pressure Instability After Refilling
System pressure instability occurs after refilling when trapped air or disturbed joints reduce hydraulic integrity. Pressure readings falling below standard operating ranges indicate sealing or bleeding deficiencies.
Valve Seizure and Mechanical Damage
Valve seizure occurs when corrosion restricts spindle movement, preventing full closure before draining. Forced valve operation damages internal seals and compromises long-term valve performance.
How Do You Refill and Restart the Heating System After Draining?
Refilling and restarting the heating system after draining requires controlled water reintroduction, air removal, and pressure normalisation, because draining introduces air into the circuit and reduces system pressure below normal operating ranges.
Reopen Radiator Valves and Secure Connections
Reopening radiator valves and securing all mechanical connections restores hydraulic continuity and prevents leakage during refilling. The thermostatic radiator valve and lockshield valve must return to their original open positions, and all union nuts and bleed screws must be fully sealed before water entry begins.
Refill the Heating System Gradually
Refilling the heating system restores water volume and operating pressure through the system filling mechanism. Water introduction must occur slowly to avoid pressure shock, with pressure rising steadily toward the normal cold operating range of 1.0–1.5 bar depending on system design.
Bleed Air from Radiators and High Points
Bleeding air removes trapped gas pockets created during draining and refilling, restoring full water circulation. Radiator bleed valves must open sequentially from lowest to highest points until air release stops and consistent water flow appears.
Recheck and Top Up System Pressure
Rechecking system pressure ensures hydraulic stability after air removal, because bleeding reduces pressure incrementally. Pressure must return to the specified cold operating range after all radiators are fully bled.
Restart Heat and Circulation
Restarting heat and circulation reactivates pumps and confirms system functionality under operating conditions. Circulation allows remaining microbubbles to migrate toward bleed points and confirms uniform heat distribution.
Inspect for Leaks and Pressure Stability
Inspecting for leaks and pressure stability confirms successful refilling and sealing. Valve joints, bleed points, and replaced components must remain dry, and pressure readings must remain stable after full heat-up and cool-down cycles.
How Do You Check for Leaks After Draining a Radiator?
Checking for leaks after draining a radiator requires visual inspection under pressure, joint verification, and short-term pressure monitoring, because disturbed valve unions and compression fittings present the highest leakage risk once water re-enters the heating circuit.
Inspect Valve Unions and Compression Joints
Valve unions and compression joints require immediate inspection because loosening and retightening alters olive seating and thread alignment. Dry tissue or cloth contact around each joint reveals seepage volumes as low as 1–2 millilitres, which indicate incomplete sealing.
Check Bleed Valves and End Caps
Bleed valves and end caps require inspection because air release and retightening disturb valve threads and sealing washers. Moisture around the bleed screw indicates insufficient closure or damaged internal seals.
Restore System Pressure and Observe Stability
System pressure observation confirms leak presence because pressure loss correlates directly with water escape from joints. A stable cold pressure reading after refilling indicates sealed connections, while a pressure drop greater than 0.1 bar within 30 minutes indicates leakage.
Run the Heating System and Reinspect
Running the heating system exposes leaks that appear only under thermal expansion and circulation. Warm pipework increases joint stress, making slow leaks visible around valves, tails, and unions.
Recheck After Cool-Down
Rechecking after cool-down confirms long-term sealing because contraction cycles reveal marginal joint failures. Stable pressure and dry fittings after a full heat-and-cool cycle confirm successful leak prevention.
Can Draining a Radiator Improve Heating Efficiency?
Draining a radiator improves heating efficiency only when draining enables sludge removal, valve correction, or flow restoration, because draining alone does not increase heat output unless internal water quality or hydraulic balance changes.
Removal of Sludge and Flow Obstruction
Heating efficiency improves after draining when draining allows removal of sludge deposits that restrict internal water flow. Magnetite and iron oxide accumulate at the radiator base in layers measuring 0.5–2.0 millimetres, reducing effective heat transfer surface area and lowering radiator output by up to 15 percent when untreated.
Restoration of Even Water Circulation
Heating efficiency improves when draining corrects uneven water circulation caused by internal blockages or valve malfunction. Restricted flow prevents uniform heat distribution across radiator panels, and drainage followed by flushing restores consistent convection and surface temperature.
Enabling Valve Repair or Replacement
Heating efficiency improves when draining enables replacement of partially seized or restricted radiator valves. Faulty thermostatic or lockshield valves limit flow rate and reduce emitter performance even when the boiler and pump operate correctly.
Removal of Contaminated Heating Water
Heating efficiency improves when draining supports replacement of degraded heating water containing high particulate concentration. Clean water reduces internal resistance and improves heat transfer efficiency between circulating water and radiator steel panels.
Situations Where Draining Does Not Improve Efficiency
Draining does not improve heating efficiency when the radiator contains clean water, functions correctly, and receives balanced flow. Air removal through bleeding addresses trapped air issues, while draining without corrective maintenance produces no measurable efficiency gain.
When Should You Not Drain a Radiator Yourself?
Draining a radiator should not be performed without professional intervention when system complexity, safety risk, or regulatory constraints exist, because improper drainage causes pressure loss, component damage, water leakage, and operational failure within integrated heating circuits.
Presence of a Sealed or Pressurised System Fault
Radiator draining should not be attempted when the heating system shows unstable pressure behaviour, because pressure loss below normal operating ranges indicates expansion vessel, pressure relief valve, or filling loop faults. Draining under fault conditions amplifies system instability and increases failure risk.
Use of a Shared or Communal Heating System
Radiator draining should not be performed on shared heating systems, because individual radiators connect to common pipework serving multiple dwellings. Local draining disrupts circulation and pressure balance beyond the individual property boundary.
Evidence of Corroded or Seized Valves
Radiator draining should not be attempted when valves show corrosion, seizure, or mechanical resistance, because forced rotation damages valve internals and pipe joints. Valve failure during draining leads to uncontrolled water release exceeding containment capacity.
Installation of Microbore Pipework
Radiator draining should not be carried out on microbore systems using 8–10 millimetre pipe diameters, because restricted flow paths increase blockage and airlock risk during water removal and refilling. Improper draining compromises circulation across the entire circuit.
Integration with Underfloor Heating Circuits
Radiator draining should not be attempted when radiators form part of a combined radiator and underfloor heating system, because shared manifolds and blending valves require controlled balancing procedures. Incorrect drainage disrupts temperature regulation and flow distribution.
Absence of Isolation Valves
Radiator draining should not be attempted when thermostatic or lockshield valves are missing or non-functional, because hydraulic isolation becomes impossible. Water release continues unchecked once unions are loosened.
Lack of Pressure Reinstatement Knowledge
Radiator draining should not be performed without understanding system refilling, air removal, and pressure normalisation procedures. Incomplete repressurisation results in circulation failure and boiler lockout conditions.
How Much Does It Cost to Drain a Radiator in the UK?
The cost to drain a radiator typically ranges between £60 and £150 for a single radiator, because the task requires labour time for isolation, controlled water removal, air bleeding, and pressure reinstatement within a domestic heating circuit.
Typical Professional Cost Range
Professional radiator draining usually falls within £60–£90 when performed as a standalone task, because the process takes 30–60 minutes under normal conditions. This range reflects standard plumbing labour rates and excludes additional repair or replacement work.
Factors That Increase the Cost
Radiator draining costs increase when access difficulty, valve condition, or system contamination extends labour time. Radiators with seized valves, heavy sludge accumulation, or restricted access require slower controlled drainage, increasing total labour charges toward £120–£150.
Cost When Combined With Other Work
Radiator draining costs increase when combined with removal, replacement, or valve upgrades, because additional mechanical work and resealing are required. Labour costs for draining plus radiator removal or refitting commonly reach £100–£200 per radiator excluding parts.
Emergency and Out-of-Hours Pricing
Emergency or out-of-hours radiator draining costs exceed standard rates, because engineers apply premium call-out charges. Evening, weekend, or urgent attendance typically increases total cost beyond £150.
Cost Comparison With DIY Draining
DIY radiator draining avoids labour cost but introduces risk of water damage, pressure imbalance, and joint leakage. Professional pricing includes correct pressure restoration and leak checks, reducing post-maintenance failure risk.
How Can You Maintain Radiators to Avoid Frequent Draining?
Maintaining radiators to avoid frequent draining requires preserving water quality, maintaining hydraulic balance, and preventing component degradation, because most draining events occur due to sludge accumulation, air ingress, or valve failure rather than routine operation.
Maintain Clean Heating Water
Clean heating water reduces the need for draining because low particulate concentration prevents internal blockage and corrosion. Regular use of corrosion inhibitors limits magnetite formation, which otherwise accumulates in layers measuring 0.5–2.0 millimetres and restricts internal flow.
Bleed Radiators Correctly and Promptly
Correct radiator bleeding prevents unnecessary draining because trapped air reduces heat output without requiring water removal. Releasing air restores circulation efficiency while preserving system water volume and pressure stability.
Keep Radiator Valves in Good Condition
Maintained radiator valves reduce draining frequency because fully functioning thermostatic and lockshield valves allow isolation without leakage. Periodic valve operation prevents spindle seizure and seal degradation caused by inactivity and corrosion.
Balance the Heating System
System balancing reduces draining frequency because even flow distribution prevents cold spots and sludge settlement. Balanced radiators receive consistent flow velocity, limiting particulate deposition at radiator bases.
Prevent Oxygen Ingress
Limiting oxygen ingress reduces corrosion and sludge formation because dissolved oxygen accelerates iron oxidation inside radiators. Maintaining sealed joints and stable system pressure prevents repeated air introduction during operation.
Monitor System Pressure Regularly
Stable system pressure reduces draining frequency because pressure loss signals leaks or air ingress that lead to repeated intervention. Early pressure correction prevents cascading faults that require radiator isolation and drainage.
Address Performance Issues Early
Early intervention prevents draining escalation because minor heat output loss often resolves through bleeding or balancing rather than full drainage. Prompt corrective action preserves radiator function and water quality.
Does the Draining Process Differ for Different Types of Radiators?
The radiator draining process follows the same hydraulic principles across radiator types, but procedural differences exist due to valve configuration, internal water volume, mounting position, and connection layout, which affect isolation method, discharge control, and residual water removal.
Panel Radiators
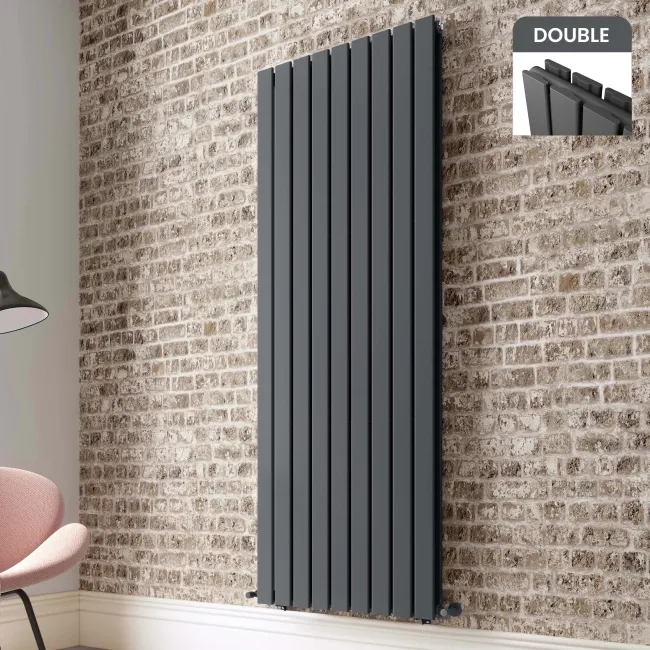
Panel radiators follow the standard draining process because panel construction uses side or bottom valve connections with predictable internal channels. Single-panel radiators typically contain 3–4 litres of water, while double-panel radiator and double-convector models contain 5–7 litres, increasing drainage duration and residual water volume.
Column Radiators

Column radiators require additional care during draining because vertical column construction traps water within multiple internal channels. Tilting and staged drainage are required to evacuate residual water retained within column sections, increasing total drainage time compared to flat panel radiators.
Towel Radiators
Towel radiators differ slightly in draining because ladder-style pipe layouts retain water in horizontal bars. Multiple tilting angles and extended air admission through the bleed valve are required to remove trapped water from upper rails.
Vertical Radiators

Vertical radiators drain more slowly because increased height alters gravity flow rate and internal pressure distribution. Water retention occurs in upper channels unless air entry remains continuous during valve union release.
Cast Iron Radiators
Cast iron radiators require controlled drainage because high internal water volume and weight increase spillage and handling risk. Older cast iron units may contain 10 litres or more of water and often lack modern isolation valves, increasing drainage complexity.
Bottom-Entry Radiators
Bottom-entry radiators require precise valve isolation because both flow and return connections sit below the waterline. Incomplete isolation causes continuous ingress during drainage, extending discharge duration.
Radiators Without Drain Valves
Radiators without drain valves rely on valve union drainage rather than dedicated outlets. Controlled union loosening and air admission become essential to prevent uncontrolled discharge.
What Should You Remember Before Draining a Radiator?
Before draining a radiator, remember that the process involves releasing pressurised heating water, introducing air into the circuit, and disturbing mechanical joints, so preparation, isolation accuracy, and pressure awareness determine whether draining remains controlled or causes leakage and system imbalance.
System Temperature and Pressure State
System temperature and pressure must remain stable before draining begins because hot or circulating water increases scald risk and uncontrolled discharge. Heating shutdown and a cooling period of 20–30 minutes reduce water temperature below 30 °C and allow internal pressure equalisation.
Full Radiator Isolation Requirement
Full radiator isolation is essential because partially closed valves allow continuous water ingress during draining. Both the thermostatic radiator valve and lockshield valve must reach fully closed positions to achieve hydraulic separation from the circuit.
Water Volume and Containment Capacity
Water volume awareness prevents overflow because a standard radiator holds 3–7 litres of water depending on size and construction. Containers with at least 10-litre capacity and absorbent surface protection prevent spillage and staining from magnetite residue.
Valve and Joint Condition
Valve and joint condition affects drainage safety because corroded or seized fittings fail under rotational force. Visible corrosion, stiff spindles, or historic seepage indicate increased leak risk during loosening and retightening.
Air Introduction Consequences
Air introduction must be anticipated because draining replaces water volume with air inside the heating circuit. Bleeding requirements increase after refilling, and unmanaged air migration causes circulation imbalance and cold radiators.
Pressure Restoration Knowledge
Pressure restoration knowledge is required because draining lowers system pressure below operational ranges. Correct refilling sequence and pressure normalisation prevent pump cavitation and heat source lockout.
Scope of Work Confirmation
Scope confirmation prevents unnecessary draining because many performance issues resolve through bleeding or balancing rather than water removal. Draining remains appropriate only for mechanical work, sludge intervention, or leak isolation.
Conclusion
Draining a radiator is a practical maintenance action used to safely isolate a radiator, remove stored water, and control pressure when bleeding is insufficient or mechanical work is required. The process relies on correct preparation, full valve isolation, controlled water release, and careful refilling to avoid leaks, airlocks, pressure instability, and surface damage.
Radiator draining remains effective only when applied for the right reasons, performed in the correct sequence, and followed by thorough bleeding, pressure checks, and leak inspection. Radiator type, valve condition, contamination level, and system design influence time, complexity, cost, and outcome. Consistent maintenance, clean heating water, and functioning valves reduce the need for frequent draining and support reliable heating performance over time.


