Bathroom wall panel installation requires 7 core steps including surface preparation, measurement, cutting, adhesive application, panel fixing, joint sealing, and finishing, delivering waterproof coverage across 2400–2700 mm panels within 1–2 days for 6–12 m² bathroom areas. Bathroom wall panels function as waterproof cladding systems made from PVC, acrylic, laminate, or composite materials that replace tiled surfaces with grout-free coverage. Installation begins with substrate preparation, including cleaning, levelling, and moisture removal to ensure adhesive bonding strength.
Measurement accuracy defines panel fit, especially around fixtures, windows, and electrical outlets where 2–3 mm clearance gaps maintain expansion tolerance. Cutting tools vary by material type, with utility knives used for PVC panels and saws used for laminate and composite panels. Adhesive application secures panels to the wall, while alignment ensures continuous surface consistency. Silicone sealant protects joints, seams, and edges to prevent water ingress.
What Are Bathroom Wall Panels?
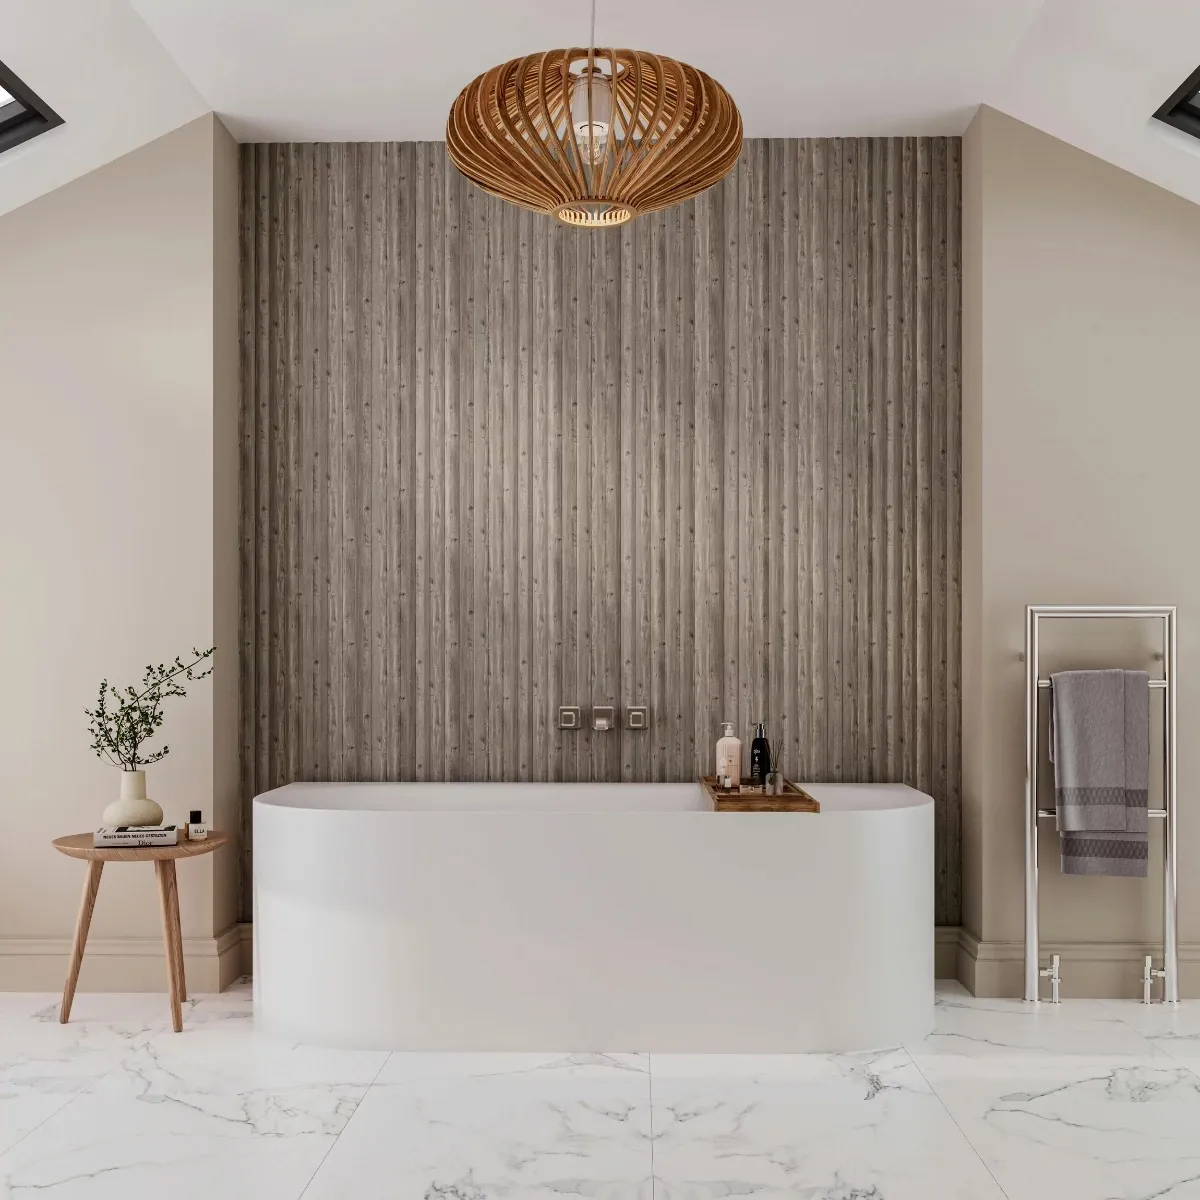
Bathroom wall panels are waterproof wall cladding boards made from PVC, acrylic, laminate, or composite materials that protect walls from moisture, provide seamless surface coverage, and install in sheet sizes typically ranging from 2400–2700 mm height and 600–1000 mm width. Bathroom wall panels function as a tile alternative by creating a continuous, grout-free surface that resists water penetration and mould formation.

Waterproof Protection
Bathroom wall panels prevent water penetration through non-porous surfaces that block moisture ingress. Panels protect underlying walls from damp damage and mould growth. Waterproof performance supports wet zones such as showers and bath surrounds.
Material Composition
Bathroom wall panels use PVC, acrylic, laminate, or composite cores to provide structural strength. Material density improves durability and impact resistance. Surface layers maintain finish quality under regular water exposure.
Panel Dimensions
Bathroom wall panels install in large sheet sizes between 2400–2700 mm height and 600–1000 mm width. Large formats reduce joint lines and improve installation speed. Panel sizing supports full wall coverage.
Seamless Installation
Bathroom wall panels use tongue-and-groove or flush joining systems to eliminate visible seams. Seamless joints reduce dirt accumulation and cleaning requirements. Continuous surfaces improve hygiene standards.
Installation Method
Bathroom wall panels fix using adhesive bonding or mechanical fixing depending on substrate condition. Installation completes within 1–2 days for standard bathroom areas. Reduced installation time improves project efficiency.
What Advantages Do Bathroom Wall Panels Offer?
Bathroom wall panels offer 6 main advantages including waterproof protection, fast installation, low maintenance, seamless finish, cost efficiency, and durability, improving bathroom performance across moisture resistance, hygiene control, and installation time within 1–2 days. Bathroom wall panels improve wall protection by forming a continuous, non-porous surface that resists water ingress and mould growth. Large panel formats reduce joint lines and simplify installation.
Waterproof Performance
Bathroom wall panels prevent water penetration through sealed, non-porous surfaces. Moisture resistance reduces risk of damp damage behind walls. Waterproof performance supports shower and bath areas.
Fast Installation
Bathroom wall panels install within 1–2 days using adhesive or interlocking systems. Large sheet sizes reduce fitting time compared to tiled surfaces. Installation efficiency improves project completion speed.
Low Maintenance
Bathroom wall panels eliminate grout lines, reducing cleaning requirements. Smooth surfaces resist dirt accumulation and mould formation. Maintenance involves simple wiping with standard cleaning solutions.
Seamless Finish
Bathroom wall panels create continuous surfaces with minimal visible joints. Seamless installation improves hygiene and visual consistency. Reduced gaps limit bacteria buildup.
Cost Efficiency
Bathroom wall panels reduce labour costs due to faster installation compared to tiling. Material costs remain competitive across PVC and laminate options. Lower maintenance reduces long-term expenses.
What Are The Different Types Of Bathroom Wall Panels?
Bathroom wall panels include 6 main types based on material composition including PVC panels, acrylic panels, laminate panels, MDF panels, composite panels, and tile-effect panels, each providing different levels of waterproof performance, durability, and installation suitability. Bathroom wall panel types differ by core structure, surface finish, and moisture resistance capability.

PVC Wall Panels
PVC wall panels use lightweight polyvinyl chloride material with thickness between 5–10 mm, providing full waterproof protection and easy installation. PVC panels resist mould growth and install using tongue-and-groove systems. PVC panels suit residential bathrooms with low to medium impact requirements.
Acrylic Wall Panels
Acrylic wall panels use solid acrylic sheets with high-gloss finishes and thickness between 4–8 mm, delivering strong water resistance and smooth surfaces. Acrylic panels resist staining and scratching. Acrylic panels provide reflective finishes that enhance light distribution.
Laminate Wall Panels
Laminate wall panels use high-pressure laminate bonded to a plywood or MDF core, offering thickness between 8–12 mm with strong structural rigidity. Laminate panels replicate stone and wood finishes. Laminate panels require proper edge sealing to maintain waterproof performance.
MDF Wall Panels
MDF wall panels use moisture-resistant medium-density fibreboard cores with decorative laminate surfaces, providing thickness between 8–12 mm. MDF panels offer cost efficiency but require sealed edges to prevent water absorption. MDF panels suit low-moisture bathroom zones.
Composite Wall Panels
Composite wall panels combine aluminium layers with a polyethylene or mineral core, delivering thickness between 10–15 mm with high durability and impact resistance. Composite panels support high-pressure environments. Composite panels provide long-term structural stability.
How Do You Prepare Bathroom Walls Before Installing Wall Panels?
Bathroom walls require 6 preparation steps including surface cleaning, moisture assessment, levelling, sealing, measuring, and marking to ensure secure adhesion and long-term panel stability across installation areas between 2400–2700 mm height.
The preparation steps for bathroom wall panels are given below:
- Clean Wall Surface: Remove dust, grease, soap residue, and loose material to create a stable bonding surface for adhesive application.
- Check Moisture Levels: Ensure walls remain dry with no active damp areas to prevent adhesion failure and mould growth behind panels.
- Level Uneven Areas: Smooth wall surfaces by filling holes, cracks, and irregularities to maintain flat installation alignment.
- Seal Porous Surfaces: Apply primer or sealant on plaster, brick, or MDF surfaces to improve adhesive bonding strength.
- Measure Wall Dimensions: Record accurate wall height and width between 2400–2700 mm coverage areas to ensure correct panel sizing.
- Mark Installation Lines: Draw vertical and horizontal guidelines to maintain alignment and straight panel positioning during installation.
What Tools And Materials Do You Need For Wall Panel Installation?
Wall panel installation requires 10 essential tools and materials including adhesive, sealant, measuring tools, cutting tools, fixing tools, and alignment equipment to ensure accurate fitting across panel sizes between 2400–2700 mm height and 600–1000 mm width.
The required tools and materials for wall panel installation are given below:
- Use Adhesive: High-strength panel adhesive bonds panels securely to wall surfaces, supporting long-term stability under moisture exposure.
- Use Silicone Sealant: Waterproof silicone sealant seals joints and edges to prevent water ingress in wet zones.
- Use Measuring Tape: Measuring tape ensures accurate wall and panel dimensions for precise cutting and alignment.
- Use Spirit Level: Spirit level maintains straight vertical and horizontal alignment during installation.
- Use Pencil Marker: Pencil marker defines cutting lines and installation guides on panels and walls.
- Use Saw Or Cutter: Fine-tooth saw or utility cutter trims panels to required sizes without damaging edges.
- Use Drill And Screws: Drill and screws secure panels mechanically where adhesive support requires reinforcement.
- Use Spacers: Spacers maintain consistent gaps between panels for expansion and alignment.
- Use Cloth Or Cleaner: Cleaning cloth removes dust and adhesive residue during installation.
- Use Protective Gear: Gloves and safety glasses protect against cuts and debris during cutting and fixing processes.
How Do You Remove Old Tiles And Wallpaper Before Installation?
Old tiles and wallpaper are removed through 6 steps including surface scoring, adhesive softening, mechanical removal, residue cleaning, surface repair, and drying to create a stable substrate for wall panel installation across full wall coverage areas.
The removal steps for tiles and wallpaper are given below:
- Score Surface Layers: Score grout lines or wallpaper seams using a utility knife to weaken bonding and allow easier removal.
- Soften Adhesive Bond: Apply warm water or a removal solution to loosen tile adhesive or wallpaper paste before stripping.
- Remove Tiles Mechanically: Use a chisel and hammer to detach tiles from the wall, starting from edges or weakened joints.
- Strip Wallpaper Layers: Peel wallpaper using a scraper after adhesive softening, removing all backing layers completely.
- Clean Residual Adhesive: Remove remaining adhesive, grout, or paste using scrapers and cleaning solutions to create a smooth surface.
- Repair Wall Surface: Fill holes, cracks, and uneven areas with filler to prepare a flat substrate for panel installation.
- Dry The Wall Fully: Allow the wall to dry completely to prevent moisture trapping behind panels during installation.
How Do You Measure And Cut Bathroom Wall Panels Accurately?
Accurate measurement and cutting of bathroom wall panels requires 6 steps including precise dimension recording, marking guidelines, tool selection, controlled cutting, edge finishing, and test fitting to ensure correct alignment across panels sized 2400–2700 mm by 600–1000 mm.

The process for measuring and cutting bathroom wall panels is given below:
- Measure Wall Dimensions: Record exact wall height and width using a measuring tape. Ensure measurements align with panel sizes between 2400–2700 mm height and 600–1000 mm width. Accurate measurement prevents fitting errors during installation.
- Mark Cutting Lines: Draw straight cutting lines using a pencil and straight edge. Maintain clear visibility of lines across the panel surface. Accurate marking ensures clean and precise cutting alignment.
- Select Cutting Tool: Choose a fine-tooth saw for laminate panels or a utility cutter for PVC panels. Tool selection depends on panel material type. Proper tool choice prevents edge damage and surface cracking.
- Cut Panels Precisely: Cut along marked lines using steady pressure and controlled motion. Avoid excessive force to prevent chipping. Controlled cutting maintains edge integrity and panel finish quality.
- Smooth Panel Edges: Refine cut edges using sandpaper or trimming tools. Remove rough or uneven sections along panel edges. Smooth edges improve joint alignment and final installation finish.
- Test Fit Panels: Position panels against the wall before fixing. Check alignment, fit, and joint positioning across the surface. Test fitting ensures correct sizing and reduces installation errors.
What Cutting Tools Work Best For Different Panel Materials?
Different panel materials require specific cutting tools including utility knives for PVC panels, fine-tooth saws for laminate panels, circular saws for composite panels, and jigsaws for acrylic panels to ensure clean cuts, edge precision, and minimal surface damage across 4–15 mm thickness ranges.
The cutting tools for different panel materials are given below:
- Use Utility Knife For PVC Panels: Score and snap PVC panels using a sharp utility knife. Apply repeated scoring along marked lines to achieve clean separation. This method suits panels between 5–10 mm thickness.
- Use Fine-Tooth Saw For Laminate Panels: Cut laminate panels using a fine-tooth hand saw or circular saw. Maintain steady cutting speed to prevent chipping. This method supports panels between 8–12 mm thickness.
- Use Jigsaw For Acrylic Panels: Cut acrylic panels using a jigsaw with a fine blade. Maintain low speed to prevent heat buildup and cracking. This method suits panels between 4–8 mm thickness.
- Use Circular Saw For Composite Panels: Cut composite panels using a circular saw with a carbide-tipped blade. Ensure straight cuts across dense materials. This method supports panels between 10–15 mm thickness.
- Use Hole Saw For Fixtures: Cut circular openings for pipes and fittings using a hole saw attachment. Match diameter to fixture size for accurate fitting. This method ensures clean openings without panel damage.
- Use Sandpaper For Finishing: Smooth cut edges using fine-grit sandpaper. Remove rough edges and improve joint alignment. This step enhances final installation quality.
What Is The Step-By-Step Process For Installing Bathroom Wall Panels?
Bathroom wall panel installation follows 7 sequential steps including surface preparation, layout marking, adhesive application, panel positioning, joint sealing, trimming, and final inspection to ensure waterproof performance and structural stability across full wall coverage areas. Bathroom wall panel installation requires controlled execution at each stage to maintain alignment, bonding strength, and moisture protection. Panel sizes between 2400–2700 mm height demand accurate positioning and secure fixing.
Step 1: Prepare Wall Surface
Clean and level the wall surface before installation. Remove dust, grease, and loose materials to ensure proper adhesive bonding. Fill cracks and smooth uneven areas to create a flat substrate.
Step 2: Mark Panel Layout
Measure wall dimensions and mark vertical and horizontal guidelines. Align panel positioning based on full wall coverage and joint placement. Accurate marking ensures straight installation.
Step 3: Apply Adhesive
Apply panel adhesive evenly across the wall or panel back using beads or spread patterns. Maintain consistent coverage to support secure bonding. Adhesive placement determines fixing strength.
Step 4: Position First Panel
Fix the first panel onto the wall following marked guidelines. Press firmly to ensure full adhesive contact. Correct alignment of the first panel sets the reference for remaining panels.
Step 5: Join Additional Panels
Connect subsequent panels using tongue-and-groove or flush joints. Maintain tight connections to eliminate gaps. Continuous joining creates a seamless surface.
Step 6: Seal Joints And Edges
Apply waterproof silicone sealant along joints, corners, and edges. Seal all exposed areas to prevent water ingress. Proper sealing ensures long-term moisture protection.
Step 7: Trim And Finish Edges
Cut excess material and fit trims around edges, corners, and fixtures. Ensure clean finishing for visual consistency. Edge finishing improves durability and appearance.
Step 8: Inspect Final Installation
Check alignment, joint sealing, and panel stability across the wall surface. Ensure no gaps or loose sections remain. Final inspection confirms installation quality and performance.
How To Handle Wall Panels Around Corners And Edges?
Handling wall panels around corners and edges requires 5 controlled steps including precise measurement, angle cutting, trim installation, joint sealing, and alignment checks to ensure waterproof continuity and structural stability across internal and external wall junctions.

The process for handling wall panels around corners and edges is given below:
- Measure Corner Angles: Measure internal and external corner angles using a measuring tool. Record exact dimensions for accurate panel fitting. Precise measurement ensures tight alignment at joints.
- Cut Panels To Shape: Cut panels at required angles using suitable cutting tools. Maintain clean edges to avoid gaps at corners. Accurate cutting improves installation finish.
- Install Corner Trims: Fit internal and external trims to support panel edges. Trim profiles secure panels and create smooth transitions. Trim installation improves structural stability.
- Seal Corner Joints: Apply waterproof silicone sealant along all joints and edges. Seal gaps to prevent water penetration behind panels. Proper sealing ensures long-term moisture protection.
- Align Panel Edges: Position panels flush against trims and adjoining panels. Maintain consistent spacing across edges. Correct alignment ensures a seamless and stable finish.
How Do You Install Wall Panels Around Bathroom Fixtures?
Installing wall panels around bathroom fixtures requires 6 steps including accurate measurement, fixture marking, precision cutting, clearance allowance, sealing, and final fitting to ensure watertight coverage around pipes, taps, and outlets within panel thickness ranges of 4–15 mm.
The process for installing wall panels around bathroom fixtures is given below:
- Measure Fixture Positions: Measure exact locations of pipes, taps, and outlets from wall edges. Record horizontal and vertical distances accurately. Precise measurement ensures correct cut placement.
- Mark Panel Cut Points: Transfer fixture positions onto the panel surface using a pencil. Mark centre points and outline required cut areas. Clear marking ensures accurate cutting alignment.
- Cut Openings Precisely: Cut holes using a hole saw or jigsaw based on fixture size. Maintain controlled cutting to avoid cracking or edge damage. Accurate cuts ensure proper fixture fitting.
- Allow Clearance Gaps: Leave 2–3 mm clearance around fixtures to accommodate expansion and alignment adjustments. Clearance prevents stress on panel edges. Proper spacing improves installation flexibility.
- Seal Around Fixtures: Apply waterproof silicone sealant around all cut openings and fixture edges. Sealing prevents water ingress behind panels. Proper sealing ensures long-term moisture protection.
- Fit Panel In Position: Position the panel over fixtures and press into place against adhesive. Check alignment and ensure tight fitting around all openings. Correct fitting completes installation around fixtures.
How Do You Install Panels Over Electrical Outlets And Switches?
Installing panels over electrical outlets and switches requires 6 steps including power isolation, faceplate removal, precise measurement, controlled cutting, clearance spacing, and resealing to ensure safe fitting and watertight protection around electrical points within panel thickness ranges of 4–15 mm.
The process for installing panels over electrical outlets and switches is given below:
- Turn Off Power Supply: Switch off electrical circuits at the mains to eliminate risk during installation. Confirm isolation using a voltage tester. Safe conditions prevent electrical hazards.
- Remove Faceplates: Unscrew and remove outlet or switch faceplates to expose the back box. Keep screws and components for reassembly. Removal creates space for panel fitting.
- Measure Outlet Position: Measure exact location and dimensions of the outlet or switch box. Record horizontal and vertical distances accurately. Accurate measurement ensures correct cut placement.
- Mark And Cut Panel: Transfer measurements onto the panel and cut openings using a jigsaw or hole saw. Maintain clean edges to prevent damage. Precise cutting ensures proper alignment.
- Allow Clearance Gap: Maintain a 2–3 mm gap around the outlet opening to accommodate panel expansion and fitting tolerance. Clearance prevents edge stress and cracking.
- Reinstall Faceplate: Fit the panel in position, then reinstall the outlet or switch faceplate over the panel surface. Tighten screws securely. Proper reassembly ensures a clean and safe finish.
How Do You Seal Panel Joints And Seams In Bathrooms?
Sealing panel joints and seams in bathrooms requires 6 steps including surface cleaning, joint preparation, silicone application, smoothing, curing, and inspection to create a waterproof barrier that prevents water ingress across all panel connections.
The sealing process for bathroom wall panels is given below:
- Clean Joint Surfaces: Remove dust, grease, and moisture from panel edges before sealing. Clean surfaces improve silicone adhesion and sealing strength. Proper cleaning ensures long-term waterproof performance.
- Prepare Joint Gaps: Ensure joints remain consistent with 2–3 mm spacing between panels. Controlled gaps allow effective sealant application. Proper preparation prevents uneven sealing.
- Apply Silicone Sealant: Apply waterproof silicone along joints and seams using a steady bead. Maintain continuous application without breaks. Even distribution ensures complete coverage.
- Smooth Sealant Line: Smooth the sealant using a finishing tool or finger to create a uniform joint line. Remove excess material during smoothing. Smooth joints improve finish quality and adhesion.
- Allow Sealant To Cure: Leave sealant to cure for 12–24 hours depending on product specifications. Avoid water exposure during curing. Proper curing ensures sealing durability.
- Inspect Sealed Joints: Check all joints for gaps, air pockets, or incomplete coverage. Reapply sealant where necessary. Inspection ensures full waterproof protection.
How Do You Install Panels In Wet Room Environments?
Installing panels in wet room environments requires 7 steps including waterproof substrate preparation, tanking application, adhesive bonding, panel positioning, joint sealing, edge protection, and drainage alignment to ensure complete moisture resistance across high-exposure areas. Wet room environments involve continuous water exposure across walls and floors, requiring reinforced waterproofing before panel installation.

The installation process for wet room environments is given below:
- Prepare Waterproof Substrate: Ensure walls use moisture-resistant boards such as cement backer boards or waterproof plasterboards. Flat and stable surfaces support secure panel bonding.
- Apply Tanking System: Coat walls with liquid waterproof membrane or install tanking sheets across full wet areas. Tanking creates a continuous waterproof barrier behind panels.
- Apply Adhesive Evenly: Spread waterproof panel adhesive across the substrate using consistent patterns. Even adhesive coverage ensures strong panel fixation.
- Position Panels Securely: Fix panels onto prepared walls following alignment guidelines. Press panels firmly to achieve full contact with adhesive. Proper positioning ensures stability.
- Seal All Joints: Apply waterproof silicone sealant along all panel joints, edges, and corners. Continuous sealing prevents water ingress behind panels.
- Install Edge Trims: Fit trims around edges, corners, and transitions to protect exposed panel sides. Trim installation improves durability and finish quality.
- Align With Drainage: Ensure panels align with wet room drainage design to prevent water pooling. Correct alignment supports efficient water flow and prevents long-term damage.
How Do You Install Wall Panels Around Bathroom Windows?
Installing wall panels around bathroom windows requires 6 steps including precise measurement, panel cutting, trim fitting, sealing, alignment, and finishing to ensure watertight coverage and structural stability around window openings within 4–15 mm panel thickness ranges.
The process for installing wall panels around bathroom windows is given below:
- Measure Window Opening: Measure window height, width, and depth from multiple points. Record exact dimensions to ensure accurate panel fitting. Precise measurement prevents gaps around the frame.
- Mark Panel Cut Lines: Transfer window dimensions onto the panel surface using a pencil and straight edge. Define exact cut-out areas clearly. Accurate marking ensures precise cutting alignment.
- Cut Panel Openings: Cut panel sections using a jigsaw or fine-tooth saw. Maintain controlled cutting to prevent edge damage. Clean cuts ensure proper fit around the window frame.
- Install Window Trims: Fit edge trims or finishing profiles around the window opening. Trims secure panel edges and create a neat transition. Trim installation improves structural support.
- Seal Around Window Edges: Apply waterproof silicone sealant along all panel-to-window joints. Continuous sealing prevents water ingress behind panels. Proper sealing ensures moisture protection.
- Align And Fix Panels: Position panels around the window and press into adhesive. Ensure tight fitting against trims and adjacent panels. Correct alignment completes a secure and seamless installation.
What Installation Mistakes Should You Avoid?
Bathroom wall panel installation mistakes include 7 critical errors such as poor surface preparation, incorrect measurements, inadequate sealing, uneven alignment, wrong adhesive use, insufficient clearance gaps, and ignoring waterproofing, leading to water ingress, panel failure, and reduced lifespan within 1–3 years.
The installation mistakes to avoid are given below:
- Ignore Surface Preparation: Unclean or uneven walls reduce adhesive bonding strength and cause panel detachment. Proper preparation ensures stable installation.
- Use Incorrect Measurements: Inaccurate measurements lead to misaligned panels and visible gaps. Precise measurement ensures correct fitting.
- Apply Inadequate Sealant: Missing or uneven sealant allows water penetration behind panels. Continuous sealing ensures waterproof protection.
- Misalign Panels: Uneven panel positioning creates gaps and weak joints. Correct alignment ensures structural stability and visual consistency.
- Use Wrong Adhesive: Incorrect adhesive type reduces bonding strength under moisture exposure. Suitable adhesive ensures long-term fixation.
- Skip Clearance Gaps: Lack of 2–3 mm expansion gaps causes panel stress and deformation. Proper spacing allows material movement.
- Ignore Waterproofing Steps: Missing tanking or sealing in wet areas leads to moisture damage behind panels. Waterproof preparation ensures durability.
How Long Does Wall Panel Installation Typically Take?
Bathroom wall panel installation typically takes 1–2 days for standard bathrooms, covering 6–12 square metres, depending on wall preparation, panel type, cutting complexity, and number of fixtures requiring precise fitting. Installation duration depends on substrate condition, panel size, and installation method such as adhesive bonding or mechanical fixing.

The time factors affecting installation are given below:
- Wall Preparation Time: Surface cleaning, levelling, and sealing require 2–4 hours depending on wall condition and existing materials.
- Panel Cutting Time: Measuring and cutting panels for corners, fixtures, and edges require 3–6 hours based on layout complexity.
- Panel Installation Time: Fixing panels onto walls using adhesive or mechanical methods takes 4–6 hours for standard areas.
- Sealing And Finishing Time: Applying sealant, fitting trims, and finishing edges require 2–3 hours for complete waterproofing.
- Curing Time: Adhesive and sealant curing requires 12–24 hours before full water exposure.
- Complex Layout Impact: Additional features such as windows and multiple outlets increase total installation time beyond standard duration.
How Much Does Professional Wall Panel Installation Cost?
Professional wall panel installation costs range between £30–£110 per m² for labour, with total installed costs between £40–£225 per m² depending on material type, panel quality, and installation complexity across standard bathroom wall areas. Wall panel installation cost depends on panel material, wall condition, layout complexity, and labour rates.
The cost breakdown for professional wall panel installation is given below:
- Labour Cost Per m²: Professional installers charge £30–£110 per m² depending on complexity, access, and wall preparation requirements.
- Total Installed Cost: Combined material and labour costs range between £40–£225 per m² based on panel type and finish quality.
- Typical Wall Cost: An average wall of 8–10 m² costs approximately £300–£900 for standard panel installations depending on materials and labour rates.
- Material Cost Impact: PVC panels cost £9–£80 per m², while premium panels increase total installation cost significantly.
- Complex Layout Cost: Installations with windows, fixtures, or multiple corners increase labour time and raise total cost beyond standard rates.
- Preparation Cost Factor: Removing tiles, levelling walls, or applying waterproofing systems increases labour cost by 10–30%.
- DIY Cost Difference: DIY installation reduces labour cost by up to 60–70%, but requires precision in cutting, sealing, and alignment.
Can You Install Bathroom Wall Panels As A DIY Project?
Bathroom wall panels can be installed as a DIY project using 7 structured steps including surface preparation, measurement, cutting, adhesive application, panel fixing, sealing, and finishing, achieving installation within 1–2 days across standard bathroom wall areas of 6–12 m². DIY installation requires basic tools, accurate measurements, and controlled execution to maintain alignment and waterproof performance.
The key considerations for DIY wall panel installation are given below:
- Require Basic Tools: DIY installation uses tools such as measuring tape, saw, adhesive, sealant, and spirit level for accurate fitting.
- Follow Structured Steps: Installation includes preparation, marking, cutting, fixing, and sealing to ensure stable and waterproof results.
- Support Fast Installation: DIY projects complete within 1–2 days for standard bathroom areas with pre-prepared walls.
- Reduce Installation Cost: DIY installation removes labour cost, reducing total project cost by 60–70% compared to professional services.
- Handle Simple Layouts: DIY installation suits flat walls without complex corners, windows, or multiple fixtures.
- Require Accurate Cutting: Precise cutting around fixtures and edges ensures proper fit and prevents gaps.
- Ensure Proper Sealing: Correct application of silicone sealant prevents water ingress and maintains long-term durability.
When Should You Hire A Professional For Installation?
Professional installation is required in 6 situations including complex layouts, structural wall issues, wet room environments, high-pressure waterproofing needs, electrical integration, and large-scale installations exceeding 10–12 m² to ensure accuracy, safety, and long-term performance. Professional installers apply advanced techniques for cutting, sealing, and aligning panels across challenging bathroom conditions.

The situations requiring professional installation are given below:
- Handle Complex Layouts: Professional installation manages multiple corners, windows, and fixtures requiring precise cutting and alignment.
- Repair Wall Defects: Professionals correct uneven, damaged, or damp walls to create stable installation surfaces.
- Install In Wet Rooms: Professional installers apply tanking systems and waterproofing layers required for high-moisture environments.
- Ensure Waterproofing Accuracy: Professional installation ensures correct sealing and joint protection to prevent water ingress.
- Manage Electrical Areas: Professionals handle panel installation around electrical outlets safely and accurately.
- Complete Large Areas: Installations exceeding 10–12 m² require professional efficiency to maintain consistent alignment and finish quality.
Can You Install Panels Directly Over Mold Or Damp Areas?
Bathroom wall panels must not be installed over mould or damp areas because trapped moisture causes structural damage, adhesive failure, and mould spread within 3–12 months, reducing panel lifespan and compromising wall integrity. Mould and damp indicate underlying moisture problems that require full remediation before installation.
The required actions before installation over damp or mould areas are given below:
- Remove Mould Growth: Clean and treat affected areas using anti-mould solutions to eliminate fungal contamination. Complete removal prevents recurrence behind panels.
- Fix Moisture Source: Identify and repair leaks, condensation issues, or ventilation problems causing damp conditions. Source correction stops further moisture accumulation.
- Dry Wall Surface: Allow walls to dry fully before installation. Drying reduces moisture content and improves adhesive bonding strength.
- Repair Damaged Substrate: Replace or repair plasterboard, plaster, or backing materials affected by moisture damage. Structural integrity ensures stable panel support.
- Apply Waterproof Treatment: Use primers or tanking systems to create a moisture-resistant barrier before panel installation. Additional protection improves durability.
- Verify Surface Condition: Confirm wall dryness and stability before installing panels. Proper verification prevents future installation failure.
Summing Up
Bathroom wall panel installation ensures waterproof performance, structural stability, and long-term durability through 7 defined steps including surface preparation, precise measurement, controlled cutting, adhesive fixing, joint sealing, trim finishing, and final inspection across 2400–2700 mm panels within 1–2 days for 6–12 m² areas.
Bathroom wall panels use PVC, acrylic, laminate, or composite materials to create non-porous, grout-free wall surfaces that resist moisture ingress and mould formation. Installation accuracy depends on flat, dry substrates, correct tool selection for each panel type, and precise cutting around fixtures, windows, and electrical outlets with 2–3 mm clearance gaps. Adhesive bonding ensures secure panel fixation, while alignment maintains continuous surface coverage. Silicone sealant protects joints, seams, corners, and edges to prevent water penetration.
Wet room environments require tanking systems and reinforced waterproofing layers before panel installation. Installation errors such as poor preparation, incorrect measurements, and inadequate sealing reduce lifespan to 1–3 years. Correct installation maintains consistent performance, supports long-term durability, and ensures reliable waterproof protection across bathroom environments.

