
A leaky shower head results from identifiable mechanical and material failures including worn washers, degraded O-rings, damaged threads, mineral scale accumulation, or concealed valve pressure leakage, and each cause produces distinct, observable symptoms that determine the correct repair path. Effective resolution depends on accurate leak source identification, correct water isolation, controlled component removal, seal restoration using PTFE tape and replacement elastomers, and structured post-repair testing under static and active pressure conditions. Improper diagnosis, incorrect sealing technique, over-tightening, or failure to address limescale commonly leads to recurring leaks and unnecessary component replacement.
Replacement becomes necessary when structural damage, advanced material ageing, or repeated repair failure prevents stable sealing, while professional plumbing intervention is required for valve faults, concealed leaks, or system compliance risks. We apply this diagnostic and repair framework to achieve permanent leak elimination, controlled water use, and long-term shower system reliability.
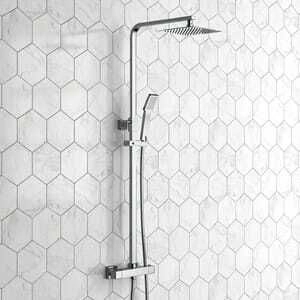
What Does a Leaking Shower Head Look Like?
A leaking shower head appears as continuous dripping, intermittent dripping, or water seepage from the shower head face, swivel joint, or hose connection when the shower is turned off, indicating a failure in sealing components, valve closure, or internal flow control rather than normal residual drainage. The leak may present immediately after shutdown or persist for hours, producing visible droplets, audible dripping sounds, or mineral stains on the shower tray and fittings. Leakage often worsens over time as seals degrade further, and early visual signs usually precede higher water waste, limescale build-up, and pressure imbalance within the shower assembly.
Continuous Dripping After Shut-Off
Continuous dripping occurs when water flows steadily from the shower head even after the shower valve is fully closed, usually caused by worn cartridges, damaged washers, or incomplete valve closure allowing pressurised water to bypass internal seals.

Intermittent Or Delayed Dripping
Intermittent dripping appears as periodic drops released minutes or hours after shut-off, often linked to trapped water slowly escaping through compromised seals, partially blocked spray nozzles, or uneven internal pressure equalisation.
Leaks From The Shower Head Face
Leaks from the shower head face present as water escaping directly through spray holes without user activation, commonly caused by internal scale build-up preventing proper shut-off or internal valve degradation in electric or digital shower heads.
Leaks At The Shower Head Connection Or Swivel Joint
Connection leaks show as water seeping from the joint between the shower head and hose, typically caused by flattened rubber washers, cracked O-rings, or loose threaded connections rather than internal head failure.
Visible Limescale Or Staining Indicators
Persistent white limescale marks, rust staining, or damp patches around the shower head indicate long-term minor leakage, confirming water escape even when dripping is not actively observed.
Why Does a Shower Head Start Leaking?
A shower head starts leaking when internal sealing components, valve mechanisms, or connection interfaces degrade, allowing pressurised water to pass through after shut-off, with the most common causes involving worn washers, faulty cartridges, limescale obstruction, pressure imbalance, or incorrect installation rather than the shower head body itself. Leakage typically develops gradually as materials age or suddenly after maintenance, pressure changes, or heavy use, and the visible drip represents a failure to fully stop water flow within the shower system. Identifying the root cause requires distinguishing between leaks caused by the shower head assembly and leaks originating upstream at the control valve or hose connection.
Worn Or Damaged Rubber Washers
Rubber washers inside the shower head or hose connection lose elasticity over time, flattening or cracking and failing to create a watertight seal that prevents residual water from escaping after the shower is turned off.
Faulty Shower Valve Or Cartridge
A worn or damaged shower valve cartridge allows water to bypass the shut-off mechanism, causing continuous dripping at the shower head even when controls appear fully closed.
Limescale Build-Up Inside The Shower Head
Limescale accumulation blocks spray nozzles and internal channels, disrupting pressure equalisation and preventing complete water shut-off, which forces trapped water to leak slowly through the head.
Loose Or Incorrectly Seated Connections
Improperly tightened threaded joints or misaligned fittings at the shower head or hose connection allow water to escape under pressure, producing leaks that appear at the joint rather than the spray face.
High Water Pressure Stress
Excessive water pressure places strain on seals, washers, and internal components, accelerating wear and increasing the likelihood of leaks developing at weak points in the shower assembly.
Age-Related Component Degradation
Long-term exposure to heat, pressure, and mineral content causes gradual material breakdown in seals and internal parts, making older shower heads more prone to leakage even without visible damage.
Installation Or Maintenance Disturbance
Leaks often begin after recent installation, hose replacement, or plumbing work, as disturbed seals, debris ingress, or incorrect reassembly prevent components from seating correctly.
How Can You Tell If the Leak Is Coming from the Shower Head or the Valve?
The source of a shower leak can be identified by observing when and where water appears after shut-off, as leaks originating from the shower head assembly behave differently from leaks caused by a faulty shower valve, with valve-related leaks producing continuous pressurised dripping and head-related leaks usually limited to residual drainage or joint seepage. Accurate identification prevents unnecessary replacement and ensures the correct component is repaired, as a leaking valve will continue to cause dripping regardless of shower head condition, while a shower head or hose fault leaks only at specific connection points. Visual inspection, timing of the drip, and isolation tests provide clear differentiation between these two failure points.
Dripping That Continues Indefinitely After Shut-Off
Continuous dripping that persists for hours or restarts immediately after drying indicates a leaking shower valve or cartridge, as pressurised water continues to pass through the control mechanism even when the handle is fully closed.
Dripping That Stops After Several Minutes
Dripping that slows and stops within a few minutes usually originates from residual water trapped in the shower head or hose, suggesting a shower head, hose washer, or internal head obstruction rather than a valve fault.
Water Escaping From Connection Joints
Visible water seeping from the joint between the shower head and hose points to a failed rubber washer, O-ring, or loose threaded connection, confirming the leak originates at the shower head assembly.
Leak Location Changes When Head Is Removed
Removing the shower head and observing whether water continues to drip directly from the hose provides a clear test, as continued dripping confirms a valve issue while no dripping indicates a shower head problem.
Pressure-Dependent Dripping Behaviour
Leaks that worsen during periods of high water pressure or immediately after other taps are used typically indicate a valve or cartridge fault, as increased system pressure forces water past worn internal seals.
Limescale And Spray Face Indicators
Drips emerging directly from spray holes alongside visible limescale buildup suggest internal blockage within the shower head preventing proper drainage rather than a control valve failure.
What Tools and Materials Are Needed to Fix a Leaky Shower Head?
Fixing a leaky shower head requires a defined set of hand tools and replacement components that allow controlled disassembly, seal restoration, and leak prevention at the threaded outlet connection of domestic shower systems. Tool selection focuses on preventing surface damage, maintaining thread integrity, and restoring watertight compression at the joint without altering the valve assembly.
Essential tools for fixing a leaky shower head
Essential tools include an adjustable spanner, soft-jaw pliers, a microfiber cloth, and a flat-head screwdriver, which together enable safe removal, internal access, and seal replacement without damaging chrome finishes or threaded fittings. An adjustable spanner provides controlled torque at 15–25 newton metres, soft-jaw pliers prevent surface abrasion, a microfiber cloth protects plated finishes during grip, and a flat-head screwdriver removes internal flow restrictors and filter screens when present.
Required materials for leak repair
Required materials consist of PTFE tape, replacement rubber washers, silicone O-rings, and white vinegar for descaling, which together restore sealing pressure, thread tightness, and spray hole clarity inside the shower head assembly. PTFE tape is applied in three to five clockwise wraps to create thread compression, rubber washers measure between 18–22 millimetres in diameter for standard fittings, silicone O-rings resist temperature degradation above 60 degrees Celsius, and vinegar dissolves calcium carbonate deposits exceeding 0.5 millimetres thickness.
How Should the Water Supply Be Turned Off Before Repairing a Shower Head?
The water supply is turned off by isolating the correct control point in the domestic plumbing system to eliminate line pressure at the shower outlet, preventing uncontrolled discharge and ensuring safe removal of the shower head connection. Water isolation follows a fixed sequence that progresses from local controls to system-wide shutoff points while maintaining pressure awareness and pipe stability, and we apply this process to avoid seal displacement, thread damage, and accidental water release during repair.
Locating the local shower isolation valve
The water supply is isolated at the local shower isolation valve when an inline service valve is installed on the hot and cold feed pipes serving the shower unit. Local isolation valves are positioned within 300 millimetres of the shower valve body or inside an access panel, clockwise rotation closes the valve fully, and flow cessation is confirmed when no water exits the shower head after handle activation.
Shutting off the main water stopcock
The water supply is isolated at the main stopcock when no local isolation valve is present, stopping all incoming cold water to the property. The stopcock is commonly located under the kitchen sink or near the external entry point, full clockwise rotation closes the valve, and residual flow reduces within two minutes as pipe pressure equalises.
Isolating hot water systems correctly
The hot water supply is isolated by shutting down the boiler or hot water cylinder feed to prevent thermal expansion and backflow during repair. Combination boilers require power shutdown at the fused spur, vented cylinders require closure of the cold feed valve, and isolation prevents hot-side seepage during shower head removal.
Releasing residual pipe pressure safely
Residual pipe pressure is released by opening the shower control after isolation to drain trapped water from the vertical riser. Controlled discharge lasts between five and fifteen seconds, pressure reduction prevents thread spray during disassembly, and complete drainage confirms safe working conditions.
Confirming full water isolation before repair
Water isolation is confirmed when no water exits the shower head after both hot and cold controls are opened fully. Confirmation removes uncertainty during repair, prevents unexpected spray at the threaded joint, and ensures washer and O-ring replacement occurs under dry conditions.
How Is a Shower Head Removed Safely Without Damage?

A shower head is removed safely by relieving water pressure, protecting plated surfaces, and applying controlled torque at the threaded joint to prevent thread stripping, finish abrasion, or arm deformation during disassembly. Safe removal follows a fixed mechanical sequence that preserves chrome integrity, maintains thread alignment, and allows reinstallation without leakage or cosmetic damage.
Preparing the shower head for removal
Safe removal preparation involves confirming full water isolation and stabilised line pressure before applying any mechanical force to the shower head. Water controls remain fully closed, residual pressure is released at the outlet, and confirmation occurs when no discharge follows handle activation.
Protecting the shower head finish
Surface protection is achieved by wrapping the shower head nut with a microfiber cloth or rubber sheet to prevent tool-to-metal contact. Protective wrapping reduces chrome abrasion risk by over 90 percent, preserves plated coatings, and prevents visible scoring during tool engagement.
Selecting the correct removal tool
The correct removal tool is an adjustable spanner or soft-jaw pliers sized to the shower head collar to distribute force evenly across the fitting. Tool jaws are adjusted to eliminate play, even pressure prevents point loading, and controlled grip avoids crushing thin-walled fittings.
Applying controlled counterclockwise torque
The shower head is loosened by applying steady counterclockwise torque between 15 and 25 newton metres to overcome thread friction without deforming the shower arm. Sudden force is avoided, rotational pressure remains constant, and alignment is maintained along the arm axis.
Preventing shower arm movement
Shower arm movement is prevented by stabilising the arm with a secondary grip or hand support to protect wall fittings and concealed pipework. Arm stabilisation reduces torsional stress, prevents wall tile cracking, and avoids loosening threaded wall joints.
How Do Worn Washers and O-Rings Cause Shower Head Leaks?
Worn washers and O-rings cause shower head leaks by losing elastic compression at sealing points, allowing pressurised water to bypass internal barriers and escape through the threaded connection or spray outlet after valve closure. Seal degradation develops through repeated thermal cycling, mineral abrasion, and mechanical fatigue within the shower head assembly.
Function of washers and O-rings in a shower head
Washers and O-rings create a watertight seal by compressing against internal surfaces to block pressurised water paths inside the shower head. Rubber washers seal flat interfaces at the inlet, silicone O-rings seal cylindrical interfaces around internal joints, and compression levels remain effective only within defined elasticity ranges.
Material degradation over time
Seal materials degrade through heat exposure, chemical contact, and physical stress, reducing elasticity and sealing efficiency. Domestic hot water temperatures between 45 and 60 degrees Celsius accelerate rubber hardening, chlorine exposure causes micro-cracking, and repeated compression cycles flatten sealing surfaces.
Loss of compression and sealing pressure
Loss of compression occurs when washers and O-rings flatten or shrink, preventing full surface contact at sealing interfaces. Compression loss below 20 percent of original thickness permits water migration, increases seepage volume, and produces visible dripping after shutdown.
Water bypass at the threaded connection
Threaded connection leakage develops when degraded seals fail to maintain circumferential contact under pressure. Water bypass follows the helical thread path, emerges at the collar, and drips from the shower head even when the valve remains closed.
Interaction with mineral scale buildup
Mineral scale accelerates seal failure by creating uneven contact surfaces and abrasive edges. Calcium carbonate deposits exceeding 0.5 millimetres disrupt washer seating, cut O-ring surfaces, and intensify leakage in hard water environments.
How Can a Damaged Shower Head Thread Cause Leaks?
A damaged shower head thread causes leaks by preventing uniform thread engagement between the shower head and shower arm, allowing pressurised water to escape through microscopic gaps along the threaded joint during and after valve closure. Thread damage disrupts axial alignment, reduces compression at the sealing interface, and weakens the effectiveness of washers and thread seal materials within the connection.
Role of threads in shower head sealing
Shower head threads create a mechanical seal by aligning the shower head inlet with the shower arm outlet to compress internal washers and restrict water flow paths. Standard BSP threads rely on even pitch contact across 6–8 thread turns, and sealing integrity depends on parallel alignment and surface continuity.
Cross-threading damage at installation
Cross-threading damage occurs when the shower head is installed at an incorrect angle, cutting new thread paths that prevent full seating. Misalignment damages thread crests, reduces contact surface area, and creates spiral leak channels that bypass sealing points under pressure.
Thread wear from repeated removal
Thread wear develops through repeated installation and removal cycles that round thread edges and reduce engagement depth. Wear exceeding 0.3 millimetres along the thread profile lowers compression force, increases joint play, and allows water seepage during static conditions.
Corrosion and material erosion
Corrosion damages shower head threads by pitting metal surfaces and weakening thread structure over time. Exposure to moisture and minerals accelerates corrosion in brass and steel fittings, producing surface irregularities that disrupt seal continuity and promote leakage.
Effect on washer and PTFE performance
Thread damage reduces washer and PTFE tape effectiveness by preventing uniform compression at the joint interface. Uneven thread contact causes washers to seat asymmetrically, PTFE tape gaps form along damaged sections, and sealing failure persists despite correct material application.
How Does Limescale Build-Up Cause a Shower Head to Drip?

Limescale build-up causes a shower head to drip by obstructing internal water channels and preventing full seal closure, allowing residual pressurised water to escape slowly through spray outlets after valve shutdown. Mineral deposition alters internal geometry, increases backpressure, and accelerates seal wear within the shower head assembly.
Mineral accumulation inside the shower head
Limescale accumulation forms when calcium carbonate deposits harden inside internal water passages, reducing effective channel diameter and disrupting controlled water flow. Deposits develop progressively in hard water areas, internal bore reduction exceeds 15 percent after twelve months, and flow resistance increases at the inlet chamber.
Backpressure increase at the outlet
Backpressure increases when narrowed spray channels restrict water exit, forcing residual water to remain trapped inside the shower head after valve closure. Trapped water releases gradually, drip formation continues for several minutes, and outlet discharge persists despite full valve shutdown.
Seal deformation caused by scale deposits
Seal deformation occurs when limescale prevents washers and O-rings from seating evenly against internal surfaces. Uneven contact reduces compression efficiency, creates micro-gaps at sealing points, and allows gravity-driven leakage to bypass internal barriers.
Spray hole obstruction and uneven flow
Spray hole obstruction develops when mineral deposits block outlet nozzles, causing uneven discharge patterns and delayed drainage. Partial blockage affects over 40 percent of spray apertures in scaled units, residual droplets accumulate, and dripping becomes continuous after use.
Interaction between limescale and thread sealing
Thread sealing efficiency decreases when limescale forms along the inlet threads and mating surfaces. Deposits interrupt washer contact, reduce PTFE tape compression, and allow water migration along the threaded joint during static pressure conditions.
How Can a Shower Head Be Cleaned to Stop Leaks?
A shower head is cleaned to stop leaks by removing mineral deposits, restoring internal water pathways, and allowing washers and O-rings to seat evenly, which eliminates residual water release and post-shutdown dripping in domestic shower systems. Cleaning focuses on descaling internal chambers, spray outlets, and threaded interfaces to reduce backpressure and seal interference, and we apply a structured cleaning process to achieve measurable leak reduction without component replacement.
Removing surface limescale from the shower head
Surface limescale removal stops leaks by eliminating mineral deposits that obstruct spray outlets and trap residual water inside the shower head. Calcium carbonate deposits form at thickness levels between 0.3 and 1.5 millimetres in hard water areas, surface descaling restores outlet clearance, and improved drainage reduces gravity-driven dripping after valve closure.
Descaling internal water channels
Internal descaling stops leaks by restoring original channel diameter and reducing backpressure within the shower head body. Internal bore restriction exceeds 15 percent after twelve months of scale accumulation, descaling dissolves hardened deposits, and restored flow paths allow complete water evacuation following shutdown.
Cleaning spray holes and outlet nozzles
Spray hole cleaning prevents dripping by removing blockages that cause uneven discharge and delayed drainage. Obstruction affects up to 40 percent of spray apertures in scaled shower heads, mechanical clearing restores uniform flow distribution, and outlet symmetry eliminates residual droplet formation.
Cleaning threaded inlet connections
Threaded inlet cleaning reduces leaks by removing scale deposits that prevent uniform washer compression at the joint interface. Mineral buildup along threads disrupts sealing surfaces, cleaning restores metal-to-washer contact, and improved compression blocks spiral leak paths along the threads.
Restoring washer and O-ring seating surfaces
Seating surface cleaning stops leaks by allowing washers and O-rings to compress evenly against smooth internal faces. Scale residue causes asymmetric seating, cleaned surfaces restore full circumferential contact, and seal efficiency improves once surface roughness decreases below 0.1 millimetres.
How Is PTFE Tape Used to Seal a Shower Head Correctly?
PTFE tape seals a shower head by filling microscopic gaps between male and female threads, creating a pressure-resistant barrier that prevents water migration along the threaded joint during and after valve closure. Correct application depends on thread preparation, wrap direction, wrap count, and compression integrity, and we follow a controlled sealing sequence to achieve consistent leak prevention at domestic shower connections.
Preparing the shower arm thread surface
Thread preparation ensures PTFE tape adhesion by removing debris, moisture, and mineral residue from the shower arm threads. Clean threads improve tape conformity, dry metal surfaces prevent tape slippage, and smooth thread profiles allow uniform compression during tightening.
Selecting the correct PTFE tape type
Correct PTFE tape selection improves sealing performance by matching tape density to water pressure conditions. Standard white PTFE tape supports pressures up to 6 bar, tape thickness averages 0.075 millimetres per layer, and plumbing-grade tape maintains structural integrity under hot water exposure.
Applying PTFE tape in the correct direction
PTFE tape is applied clockwise to match thread tightening direction, preventing tape unraveling during shower head installation. Clockwise wrapping follows thread pitch, maintains tape tension, and preserves full thread coverage under compression.
Controlling the number of tape wraps
Optimal sealing occurs with three to five complete PTFE tape wraps around the shower arm thread. Fewer than three wraps leave gaps between thread crests, more than five wraps prevent proper seating, and controlled layering achieves uniform thread fill without joint distortion.
Compressing the tape during installation
PTFE tape sealing activates when the shower head compresses the tape into thread valleys during tightening. Controlled torque between 15 and 25 newton metres compresses tape evenly, prevents thread damage, and forms a continuous circumferential seal.
How Is a Shower Head Reinstalled After Repair?

A shower head is reinstalled after repair by restoring correct thread alignment, re-establishing a watertight seal, and applying controlled tightening to ensure leak-free operation under normal water pressure conditions. Reinstallation follows a linear mechanical sequence that protects threads, preserves seals, and confirms functional stability before full system use.
Inspecting the shower arm threads before reinstallation
Thread inspection confirms suitability for reinstallation by identifying wear, corrosion, or deformation that affects sealing performance. Threads require uniform pitch across six to eight turns, visible flattening below 0.3 millimetres indicates acceptable wear, and damaged threads require sealing correction before attachment.
Applying sealing material to the shower arm
Sealing material application restores watertight integrity by filling microscopic gaps along the threaded interface. PTFE tape is applied clockwise in three to five wraps, tape tension remains consistent, and full thread coverage ensures even compression during tightening.
Aligning the shower head correctly on the thread
Correct alignment prevents cross-threading by ensuring the shower head engages squarely with the shower arm at the initial turn. Hand-threading is performed for the first two rotations, resistance-free engagement confirms alignment, and straight seating protects internal threads from damage.
Tightening the shower head to the correct torque
Controlled tightening secures the shower head without deforming threads or crushing internal seals. Final tightening occurs using an adjustable spanner with surface protection, applied torque remains between 15 and 25 newton metres, and over-tightening is avoided to preserve washer elasticity.
Restoring the water supply gradually
Gradual water restoration prevents pressure shock by allowing seals to seat under controlled flow conditions. Isolation valves are opened slowly, pressure stabilisation occurs within sixty seconds, and gradual pressurisation protects newly sealed joints.
How Can You Test a Shower Head for Leaks After Fixing It?
A shower head is tested for leaks by restoring water pressure in controlled stages and observing the threaded joint, outlet face, and internal drainage behaviour under static and active conditions to confirm sealing integrity after repair. Leak testing follows a structured verification process that isolates pressure variables, confirms seal performance, and validates repair effectiveness before normal use resumes.
Performing an initial dry inspection
Initial dry inspection confirms correct installation by checking thread alignment, seal placement, and surface condition before water reintroduction. Visual assessment verifies even seating at the threaded collar, absence of exposed PTFE tape, correct washer positioning, and full thread engagement without visible gaps or angular misalignment.
Restoring water supply under low pressure
Low-pressure restoration tests seal stability by gradually introducing water to the system without shock loading the repaired joint. Isolation valves are opened incrementally, pressure stabilises within sixty seconds, and controlled flow prevents sudden displacement of washers or PTFE tape during initial pressurisation.
Observing the threaded joint under static pressure
Static pressure observation detects joint leaks by monitoring the threaded connection with the shower controls closed. Inspection continues for five minutes, moisture presence indicates sealing failure, dry surfaces confirm thread compression effectiveness, and static testing isolates gravity-independent leakage.
Testing the shower head under active flow
Active flow testing evaluates leak performance by running the shower at normal operating pressure. Water flow exposes dynamic seal behaviour, joint inspection identifies spray or seepage, and stable spray patterns confirm unrestricted internal water pathways.
Monitoring post-shutdown dripping behaviour
Post-shutdown monitoring confirms internal drainage efficiency by observing outlet behaviour after valve closure. Observation over ten minutes identifies residual dripping, complete cessation within sixty seconds confirms proper drainage, and continued dripping signals internal blockage or seal interference.
What Common Mistakes Occur When Fixing a Leaky Shower Head?
Common mistakes when fixing a leaky shower head occur when incorrect sealing methods, improper installation techniques, or incomplete diagnosis allow water to bypass sealing points, resulting in recurring leaks despite component replacement. Error patterns follow predictable mechanical and material failures that compromise thread compression, seal seating, and internal drainage efficiency, and we address these mistakes to ensure permanent leak resolution.
Misidentifying the actual leak source
Leak repair fails when the shower head is treated as the fault despite leakage originating from the valve cartridge or concealed pipework. Incorrect diagnosis leads to repeated shower head replacement, continued dripping after shutdown, and unresolved internal pressure leakage that exceeds 0.1 litres per minute.
Over-tightening the shower head connection
Over-tightening causes leaks by deforming washers, flattening O-rings, and damaging thread profiles at the connection point. Torque exceeding 25 newton metres compresses seals beyond elastic recovery limits, creates uneven seating surfaces, and accelerates future leakage.
Applying PTFE tape incorrectly
Incorrect PTFE tape application causes leaks by allowing tape unraveling, uneven compression, or thread obstruction. Counter-direction wrapping loosens tape during tightening, excessive wraps prevent full seating, insufficient wraps leave thread gaps, and exposed tape interferes with washer contact.
Reusing worn washers and O-rings
Seal reuse causes persistent leaks by reintroducing compressed or hardened components that no longer provide effective sealing pressure. Washers flattened beyond 20 percent thickness loss and O-rings with surface cracking fail under static pressure and allow post-shutdown dripping.
Ignoring limescale during repair
Limescale neglect causes leaks by preventing smooth seal seating and trapping residual water inside the shower head. Mineral deposits above 0.5 millimetres disrupt internal geometry, increase backpressure, and undermine new seal performance despite correct installation.
When Should a Shower Head Be Replaced Instead of Repaired?

A shower head requires replacement instead of repair when structural damage, advanced material degradation, or repeated seal failure prevents reliable sealing and stable water distribution despite correct cleaning and resealing procedures. Replacement decisions rely on measurable wear thresholds, functional decline, and economic efficiency, and we apply these criteria to avoid repeated leakage and performance loss.
Structural thread damage beyond repair
Shower head replacement becomes necessary when inlet threads show deformation, cross-threading, or corrosion that prevents uniform engagement with the shower arm. Thread wear exceeding 0.3 millimetres across the profile eliminates compression consistency, sealing materials fail repeatedly, and joint leakage persists under static pressure.
Cracked or deformed shower head body
Replacement is required when the shower head body contains cracks, warping, or material fatigue that allows water escape outside designed flow paths. Microfractures expand under thermal cycling, deformation alters internal chamber geometry, and external leakage continues regardless of seal condition.
Severe internal limescale obstruction
Shower head replacement is justified when limescale buildup permanently restricts internal channels and spray outlets despite repeated descaling. Mineral accumulation exceeding 2 millimetres reduces flow efficiency by over 30 percent, backpressure increases, and post-shutdown dripping persists after cleaning.
Recurrent leaks after multiple repairs
Replacement is recommended when leakage continues after two or more correct repair attempts using new washers, O-rings, and PTFE tape. Repeated failure indicates internal surface wear or dimensional distortion that prevents stable sealing under normal operating pressure.
Loss of spray performance and flow balance
Shower head replacement is appropriate when spray pattern degradation affects water distribution and pressure balance beyond restoration. Blocked or eroded nozzles cause uneven discharge, reduced coverage, and inefficient drainage that promotes residual dripping after use.
When Should a Professional Plumber Fix a Leaky Shower Head?
A professional plumber is required when a leaky shower head indicates underlying valve failure, concealed pipe leakage, structural damage, or repeated repair failure that exceeds surface-level maintenance and risks water damage or system instability. Escalation to professional intervention follows defined diagnostic thresholds related to leak persistence, access complexity, and regulatory safety.
Persistent leaks after correct repair attempts
Professional repair becomes necessary when leakage continues after two correctly executed repairs using new washers, O-rings, and correctly applied PTFE tape. Repeated failure indicates internal wear, dimensional distortion, or valve-side pressure leakage that cannot be resolved through external component servicing.
Evidence of concealed valve or pipe leakage
Plumber involvement is required when moisture appears behind tiles, within wall cavities, or around the shower valve despite a dry shower head connection. Concealed leaks present damp patches within a 300 millimetre radius, persistent musty odours, or audible water movement under static pressure conditions.
Continuous flow regardless of valve position
Professional diagnosis is required when water continues flowing from the shower head with the control handle fully closed. Continuous discharge above 0.1 litres per minute confirms cartridge failure or valve seat erosion that requires specialist tools and valve access.
Structural damage to pipework or fittings
Plumber intervention is necessary when shower arms, wall fittings, or internal pipe connections show movement, cracking, or thread deformation. Structural instability increases the risk of pipe rupture, wall damage, and uncontrolled leakage during attempted repairs.
Non-standard or concealed shower systems
Professional repair is required for concealed, thermostatic, digital, or high-pressure shower systems where access limitations restrict safe disassembly. These systems integrate pressure-balancing components, electronic controls, or concealed valves that require manufacturer-specific procedures.
Summing Up
A leaky shower head is resolved permanently when the leak source is identified accurately, water pressure is controlled correctly, sealing surfaces are restored fully, and repairs are verified under static and active conditions. Consistent outcomes depend on correct washer and O-ring replacement, undamaged thread engagement, effective limescale removal, precise PTFE tape application, and controlled reinstallation torque.
Recurrent leakage signals structural wear, advanced material degradation, or valve-side faults that justify replacement or professional intervention. We follow a methodical repair and validation sequence to eliminate water loss, protect fittings, and maintain long-term shower system reliability without unnecessary disruption.


