
Fitting a new shower? If you’ve come to the point of installing your shower enclosure, you’ve come to the right place. We’ve enlisted the help of resident DIY expert Craig Phillips to show you how to install a sliding shower enclosure!
As Well As The Contents Of Your Enclosure, You Will Need:
- Spirit Level
- Silicone in a silicone gun
- Cordless drill
- Drill bit suitable for your tiles
- Tape measure
- Pens/ pencils for marking
- Screwdriver
- Rubber mallet
- Detector
- Instruction manual
1 – Planning Your Sliding Shower Enclosure
Before you begin, plan out the pieces you have in the box your enclosure came in. This allows you to know what you’re working with and ensure you have everything you need. You can check the instruction manual to make sure.
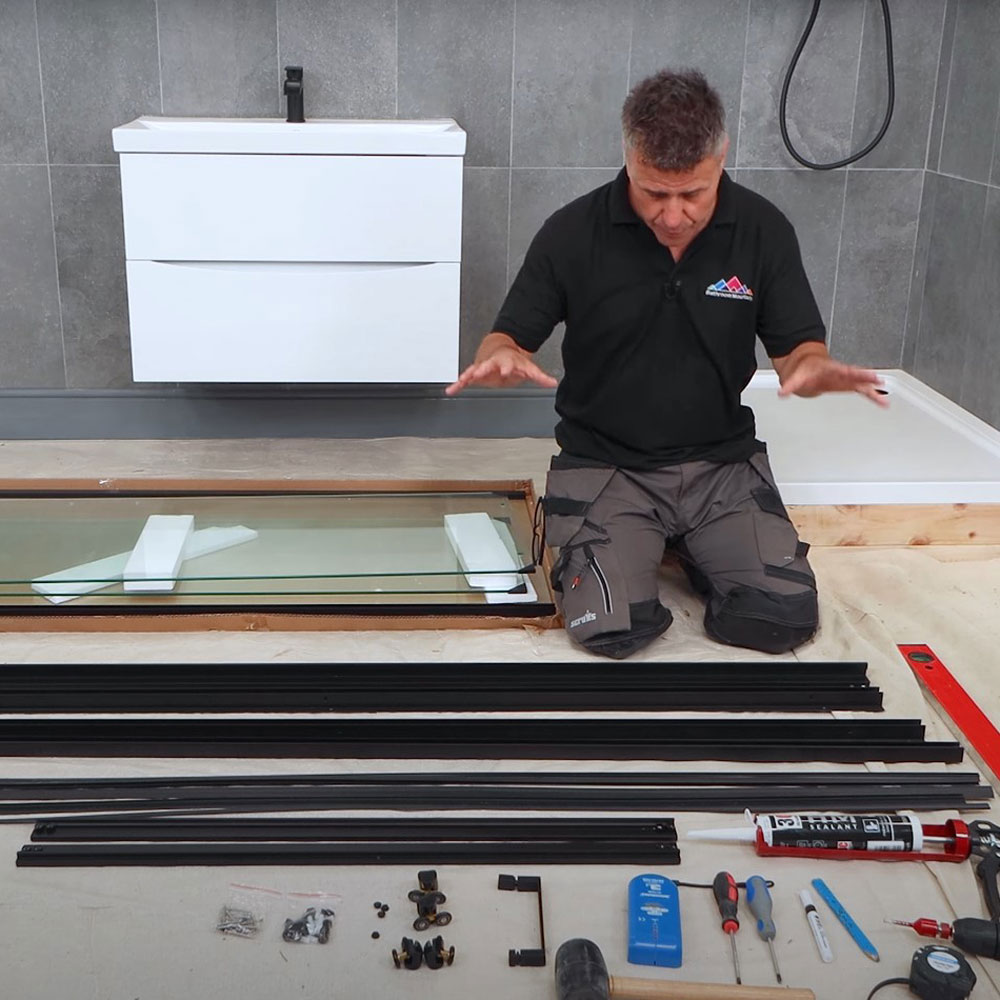
Ensuring you have enough floor space to do so, find the four frame pieces for the side of the shower enclosure that will frame the sliding door. There should be two shorter pieces and two longer pieces. Lay these on the floor in their correlating positions. Check the instruction manual to ensure you have the correct top and bottom pieces.
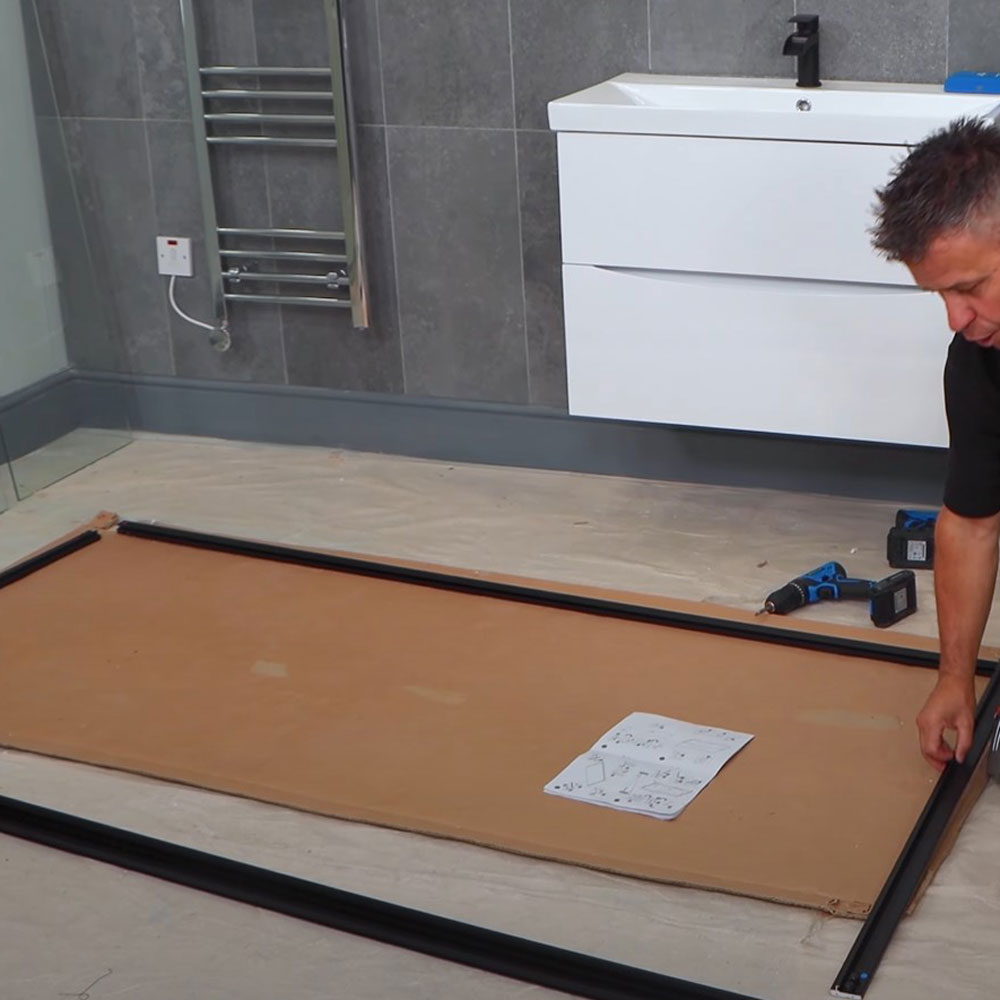
2 – Assembling Your Sliding Door Frame
To assemble the frame that will be holding your sliding door, locate the pre-drilled pilot holes on the longer pieces at the top and the bottom, and line them up with the pre-drilled pilot holes on the shorter pieces. Check the manual for what screw you need to implement here, and when you’ve located the correct pieces screw them into place with a screwdriver.
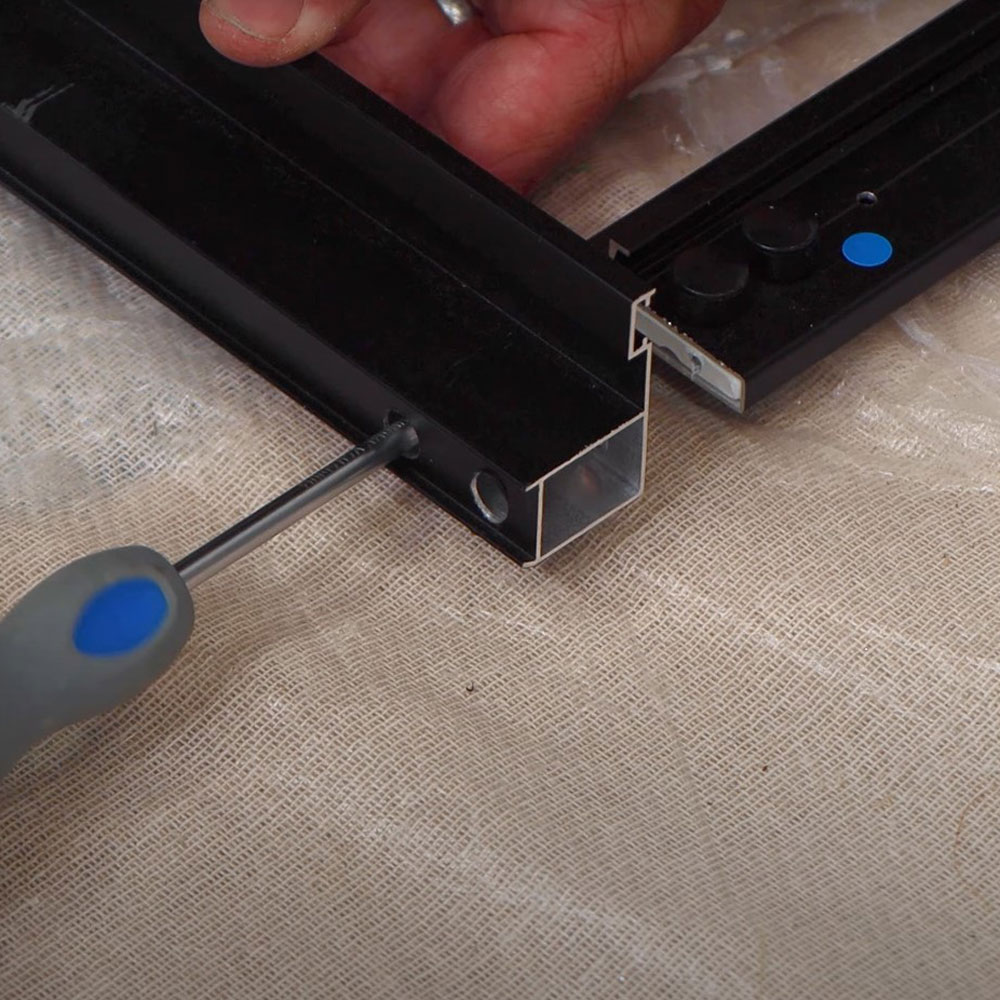
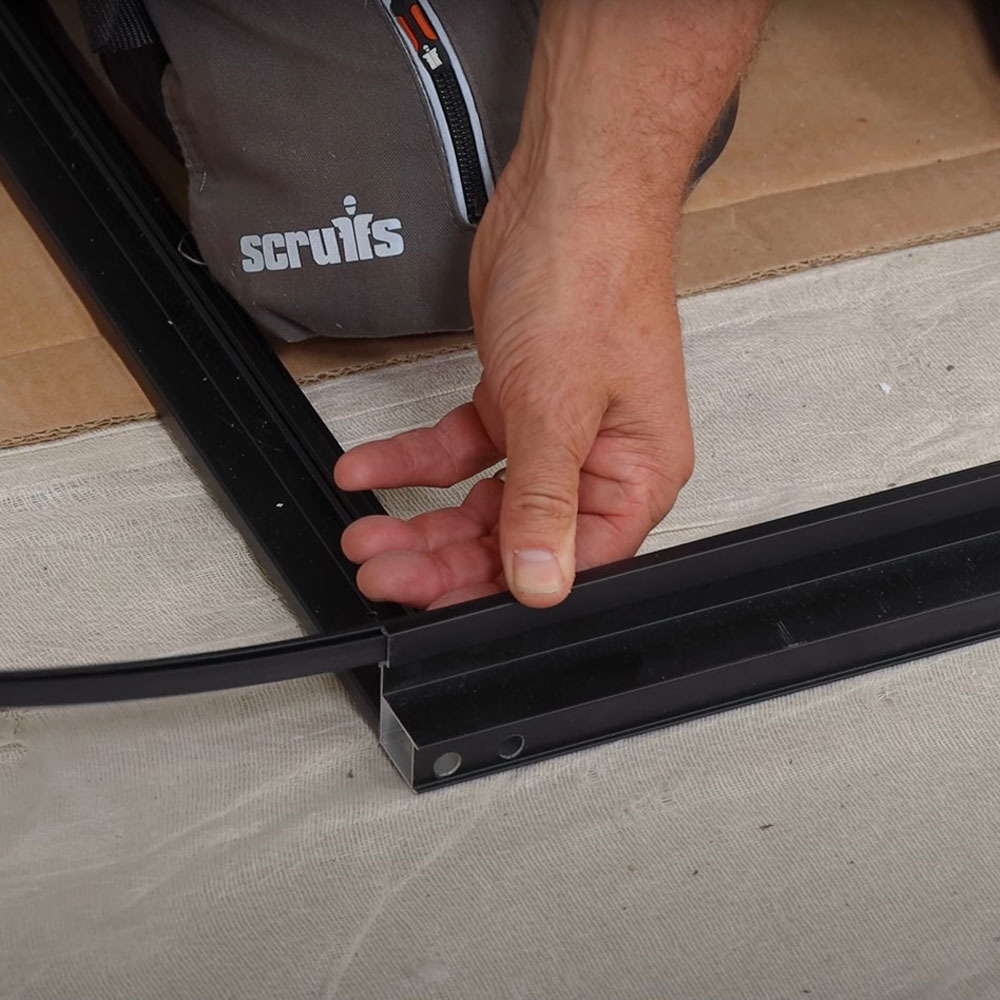
Ensuring all your grooves on the top and bottom pieces are in place for the rollers of the sliding door, do this across all four corners. Before raising your frame into place, locate the two magnetic sealing strips, and slide the slimmer piece into place in your newly built frame. Put the other piece aside for later.
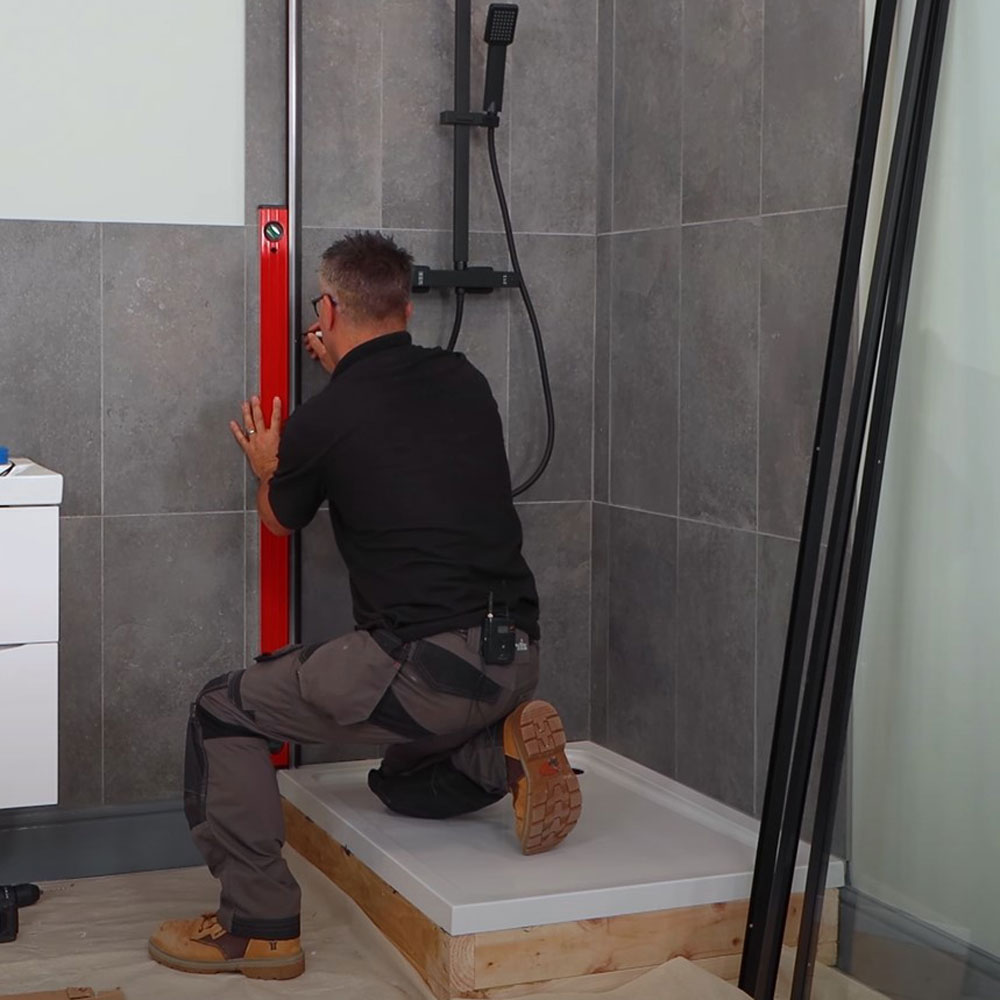
Carefully raise the frame and align with the wall and shower tray. Taking note of where this lands, you can now begin to attach the channels onto the wall that your enclosure will later be attached to.
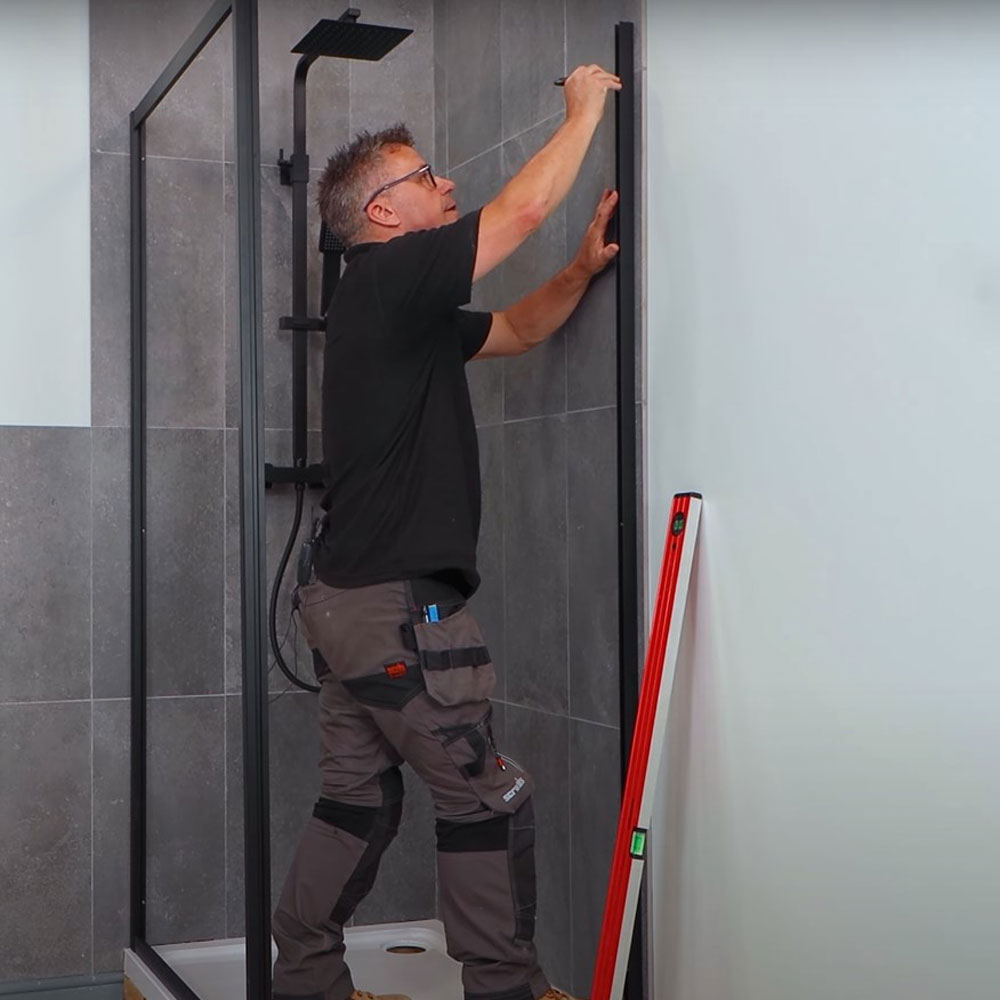
3 – Mounting The Channels
Now you can mount your channels onto the wall. Hold the first channel into position and use a spirit level to ensure it is straight and make a mark on your tiles where the pre-drilled pilot holes are.
Use your detector to ensure you are not planning to drill over any pipes or wires behind the tiles. Drill holes into your tiles where you have your marks. Start to drill on an angle, and as you feel the drill pierce the tile, move it up to a 90-degree angle.
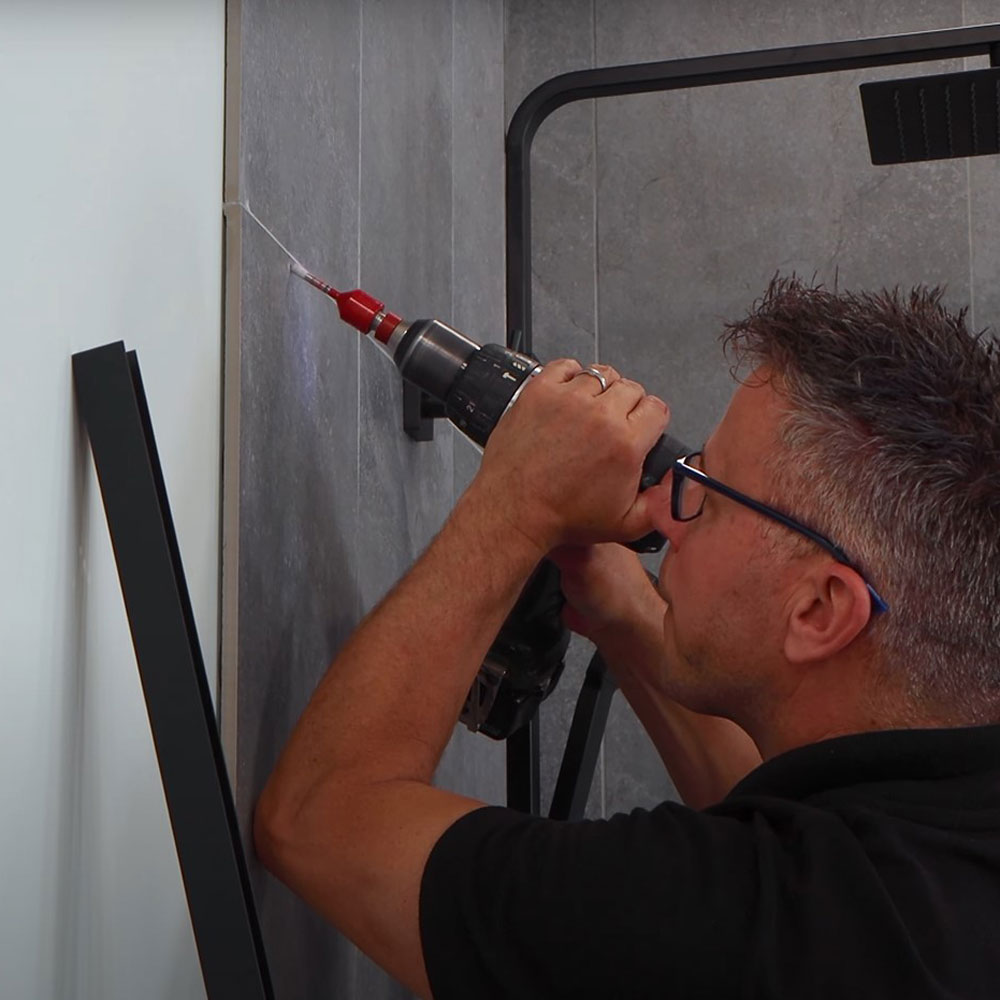
Place plastic wall plugs into the holes and gently tap them into place with a rubber mallet to prevent damaging your tiles. Place your first channel section into place and, ensuring it’s straight, drive the screws through the pilot holes and the holes that you have just drilled in the wall.
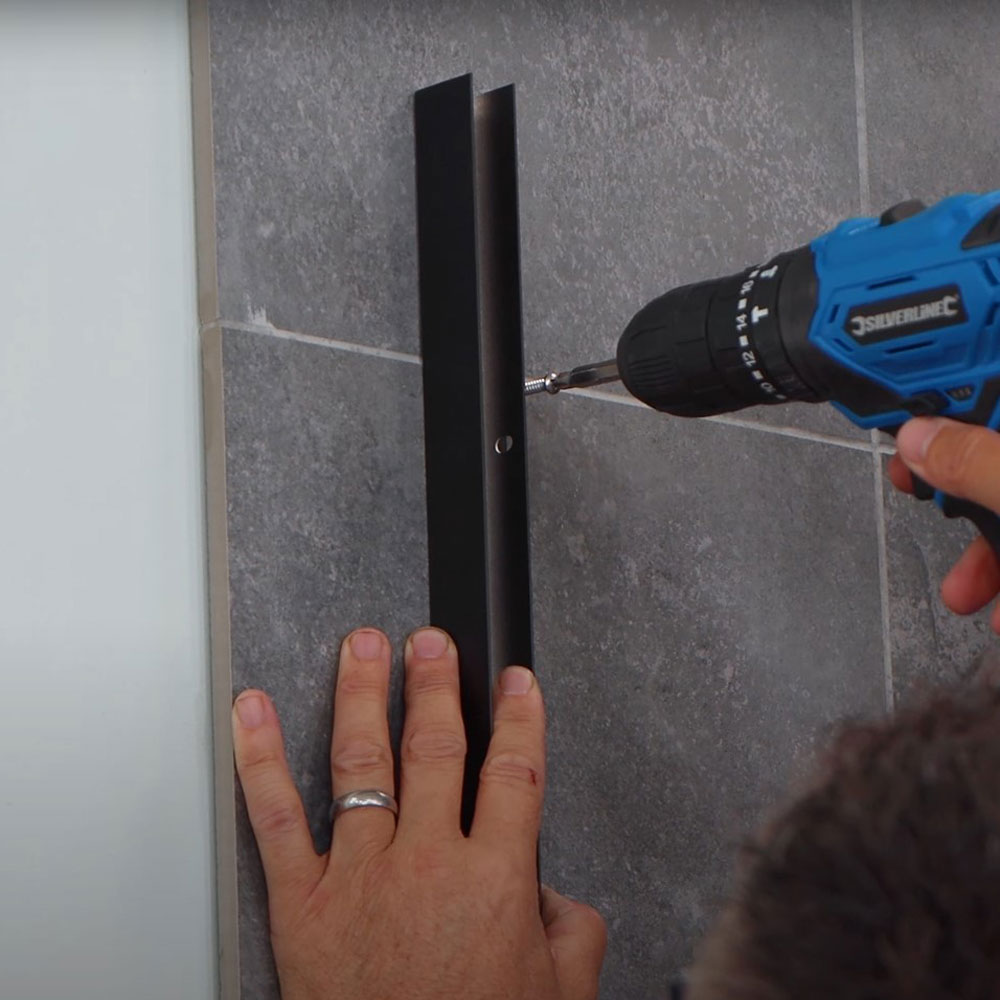
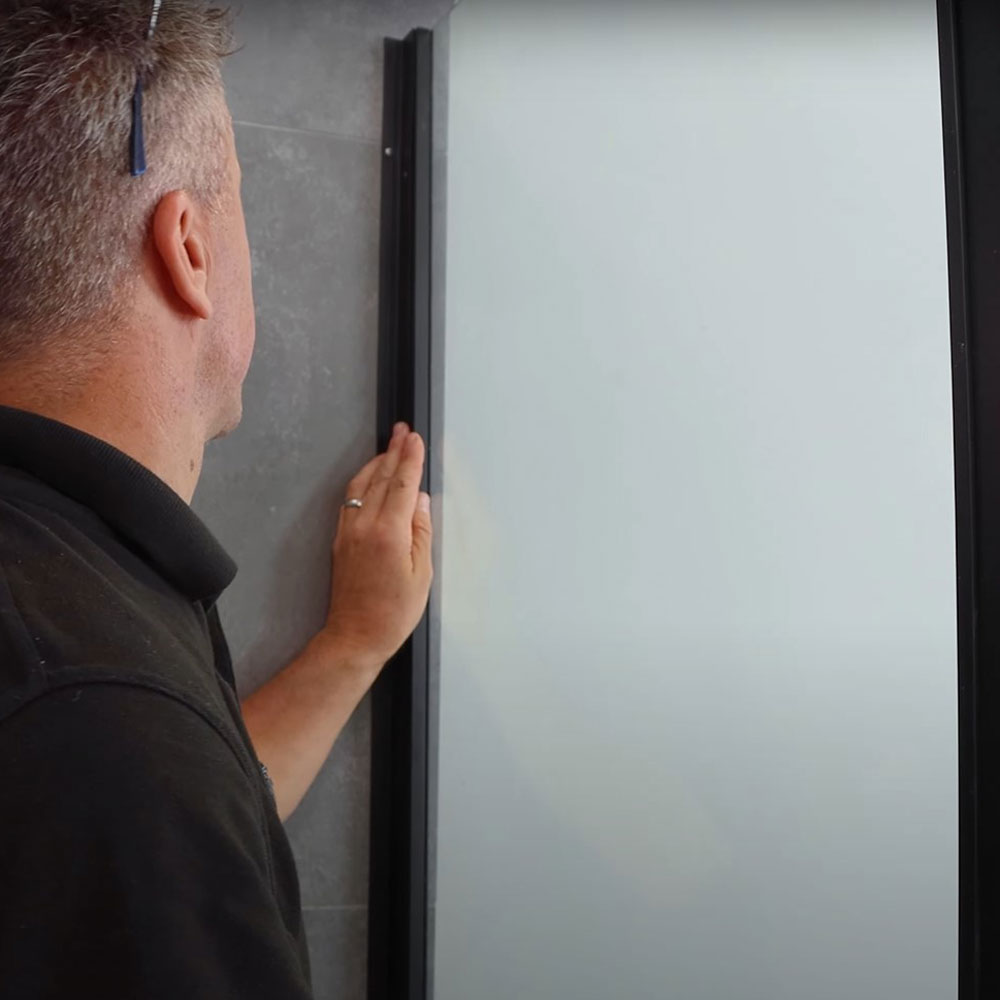
Lift the frame you built earlier on and slide it into your newly mounted wall channel. Use your spirit level to ensure all areas of this are straight. Mark on your shower tray where this frame sits so you can ensure the same amount of tray is exposed the whole way around the enclosure. This will also help you understand where your second wall channel will go.
Repeat the same process you completed to mount the previous channel, by marking where to drill, drilling and screwing into place.
4 – Installing The Larger Side Glass Panel
Before installing your sliding door, you must install the side panel that does not manoeuvre. Begin by placing a piece of cardboard over your shower tray to prevent damage, but also rest the glass panel on. If you have someone to help, ask them to give you a hand lifting this and getting it into position. From inside the shower, slide the panel into the wall channel you’ve mounted, then into the frame you built earlier on.
5 – Attaching The First Section of The Door
This section will be the glass panel that doesn’t move or slide. From inside the shower, lift the glass panel into place and rest it on the bottom rim of the enclosure. Slide it into place with the wall channel, so it holds itself into place.
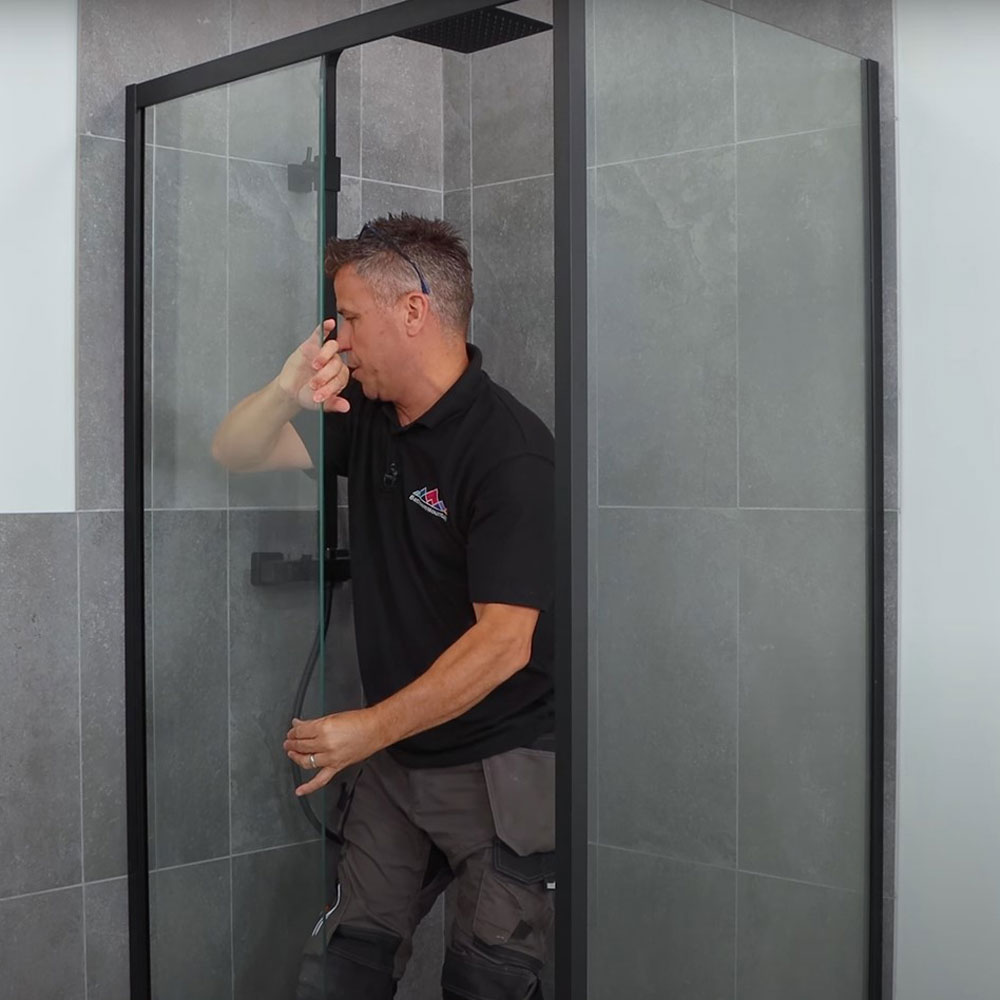
Check your instruction manual to locate the two pieces that you need to attach to the top and bottom of the glass panel to ensure it doesn’t move or come out of place. In the corner of the frame you built that sits against the wall, push the sealing strip provided into place.
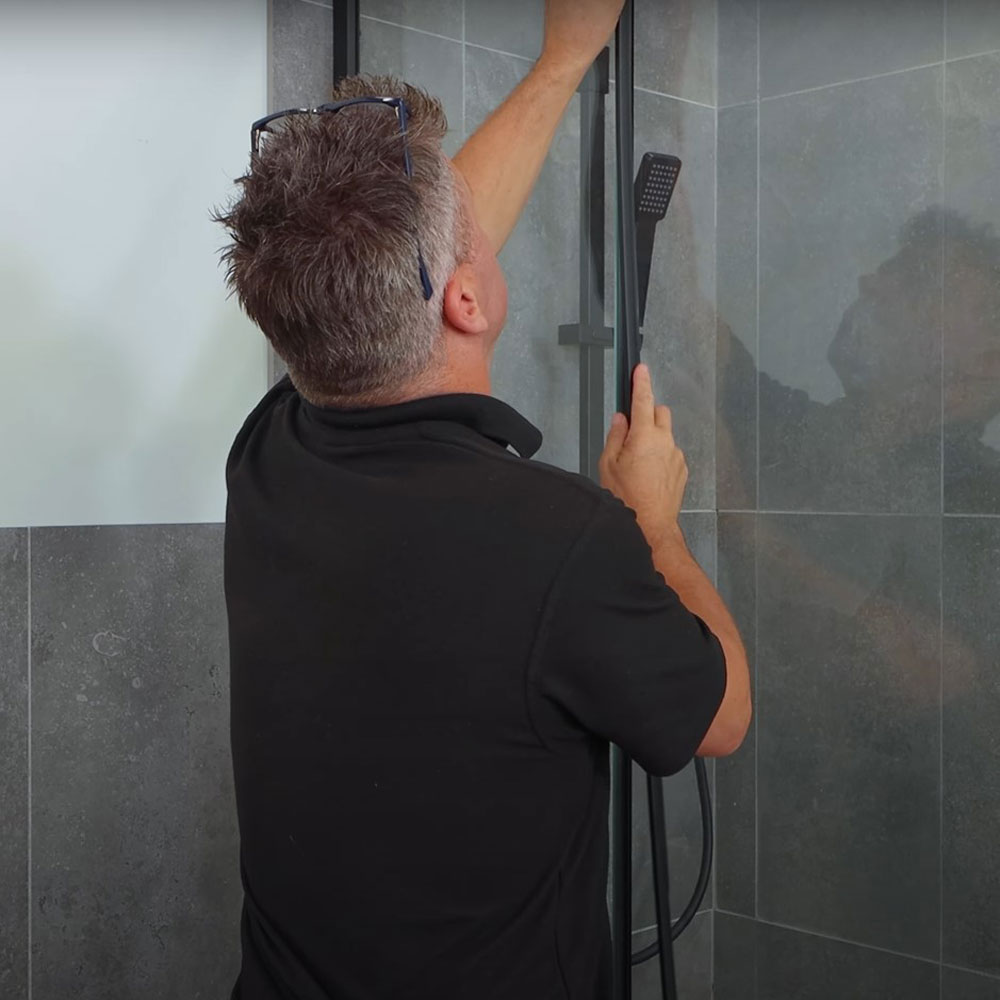
6 – Hanging Your Sliding Door
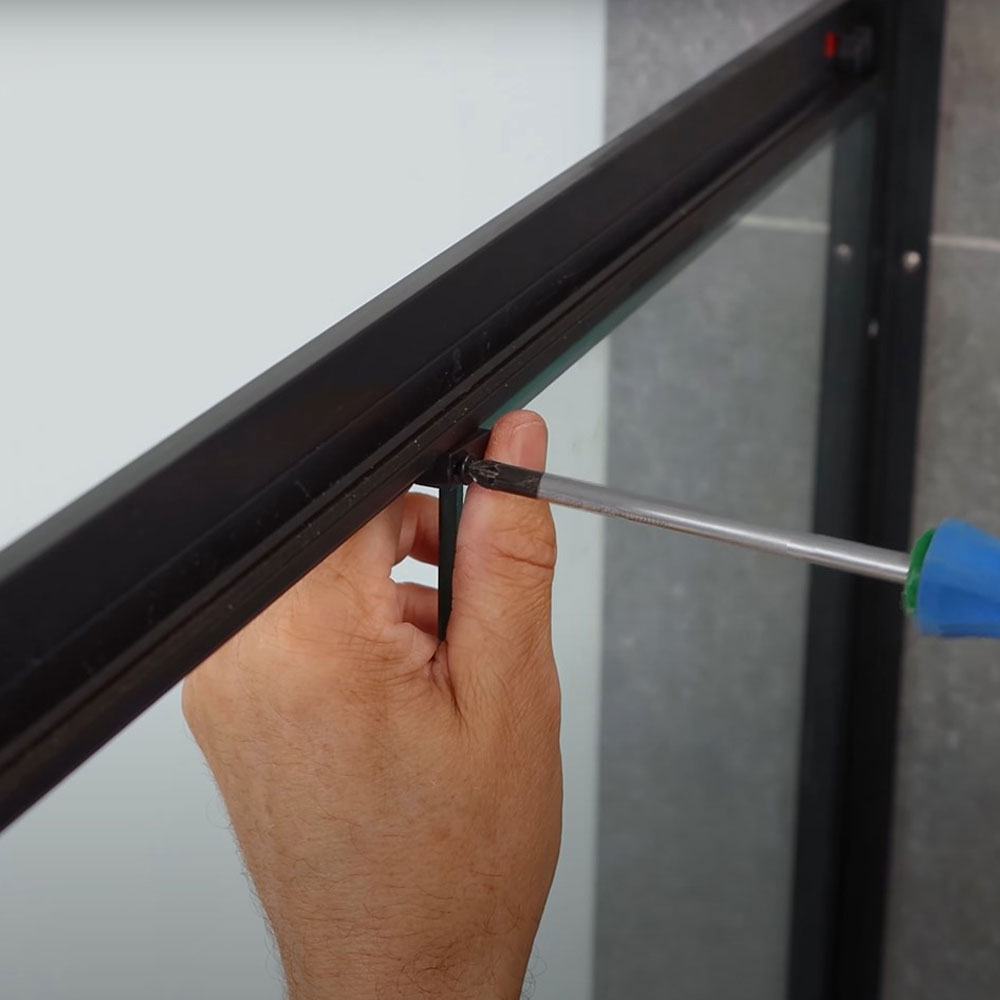
Your sliding door will be held into position by four rollers. Two along the top and two along the bottom. To attach these, loosen the screws that are already in place, and slide them over the glass to line up with the pre-drilled holes in the panel. Tighten the screws back up again to secure these into place. When fixing these, place the glass panel on something that will raise it off the ground, to prevent putting unnecessary strain in the glass.
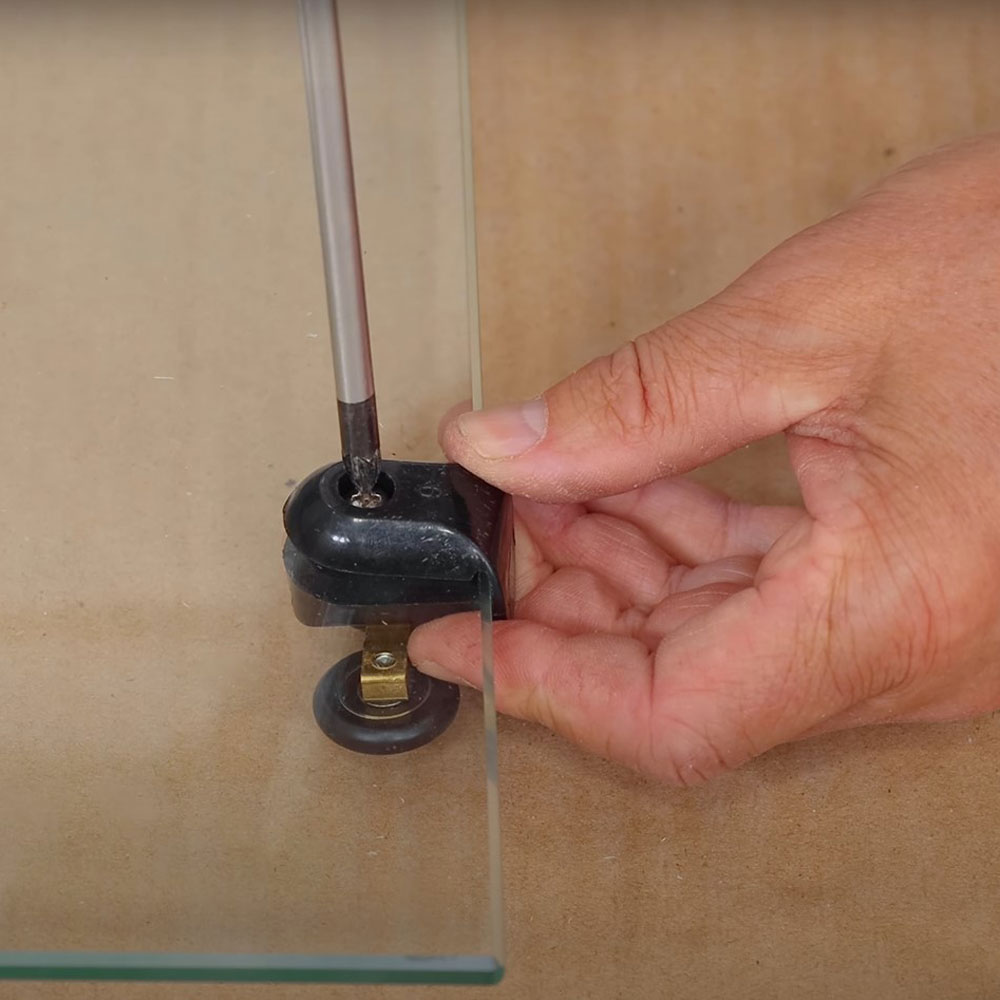

If you have someone to help, ask them to assist with lifting this panel, and hang it in place with the rollers along the top of the frame. The bottom runners should have buttons on, press these to hook them into place and ensure they are secure.

Find the other magnetic sealing strip you put aside earlier, and attach this to the edge of the sliding panel. Find the two rubber bumpers provided in the packaging and fit the larger one at the bottom and the smaller one at the top where the wheels hit the frame.
7 – Putting Your Finishing Touches In Place
Your handle will normally come in three components. Detach these from one another, and from the inside of the enclosure, feed through the two smaller pieces into the pre-drilled holes in the glass panel. Then, you should be able to place the front of your handle into place, screwing these pieces back together.
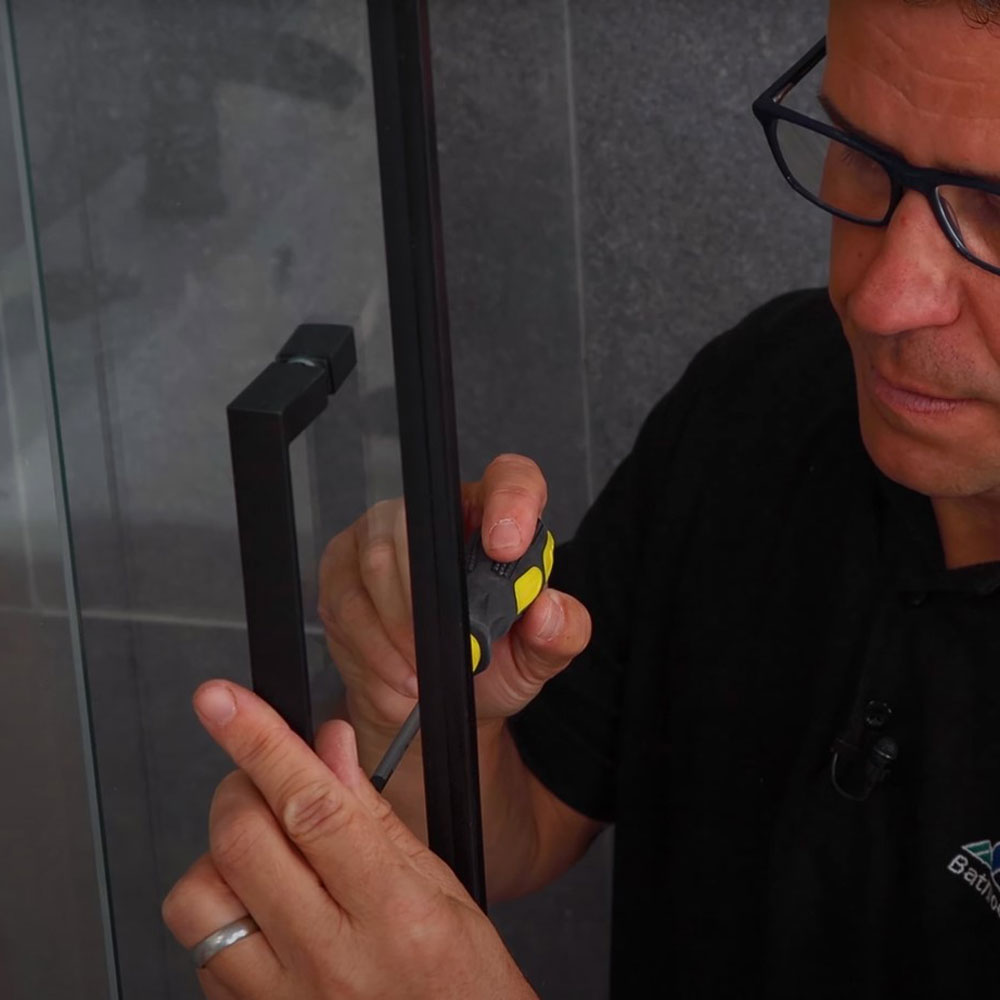
This is also where you can install any screw covers you have. Check your instruction manual for how to do this. Place any remaining sealing strips onto the glass panels on the sliding door, to prevent water from escaping while in the shower.
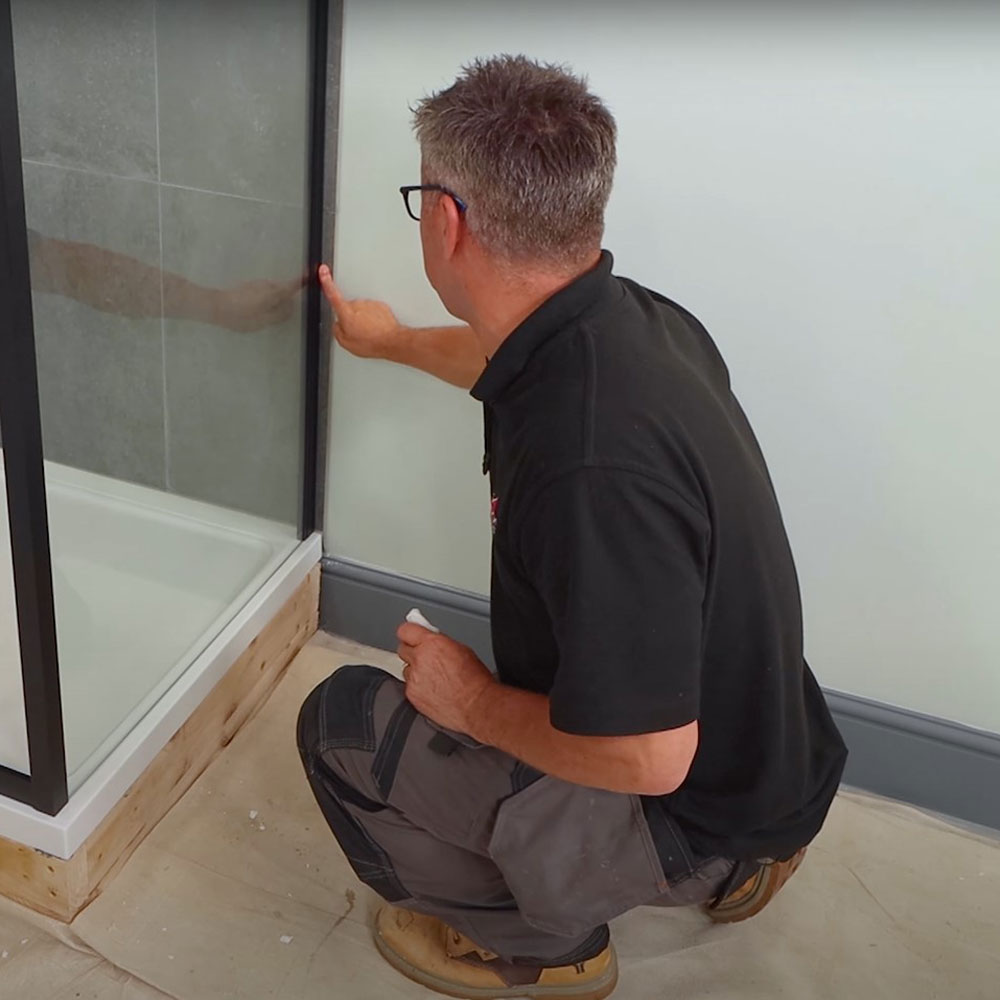
To complete your shower enclosure, with silicone and a silicone gun, put a strip of silicone across any area where the shower enclosure makes contact with the walls or the shower tray. When you’ve applied the silicone, wipe your finger with a silicone wipe and run your finger along the strip to neaten it up and ensure it’s flush with the two surfaces.

There you have it! With the help of our blog and Craig Phillips, you’ve installed your very own sliding shower enclosure! For the step-by-step instructions in video format, check out our YouTube Video. To find the exact shower enclosure used in this tutorial, check out our London range of enclosure. Be sure to tag us in your DIY projects on Instagram, @Bathroomountainuk. We love to see what you’ve been up to!


