
Changing bathroom taps depends on tap design, basin structure, pipework condition, isolation valve performance and connector compatibility because mechanical resistance, alignment space and sealing behaviour determine replacement difficulty.
Access clearance, thread condition, valve stability, platform depth and fixing geometry influence removal force, tightening accuracy and overall installation time during changing bathroom taps. Tap configuration, basin shape, corrosion levels, compression-joint position and backnut rigidity affect handling control and sealing reliability throughout the replacement process.
Tool selection, structured preparation, controlled isolation and precise reconnection define workflow efficiency during changing bathroom taps. Cost and duration vary according to mechanical resistance, cavity size and alignment complexity encountered during removal and installation.
Correct tap selection, accurate spacing, suitable valve structure and compatible connectors reduce installation errors, strengthen sealing consistency and improve overall performance during changing bathroom taps.
What are Bathroom Taps?
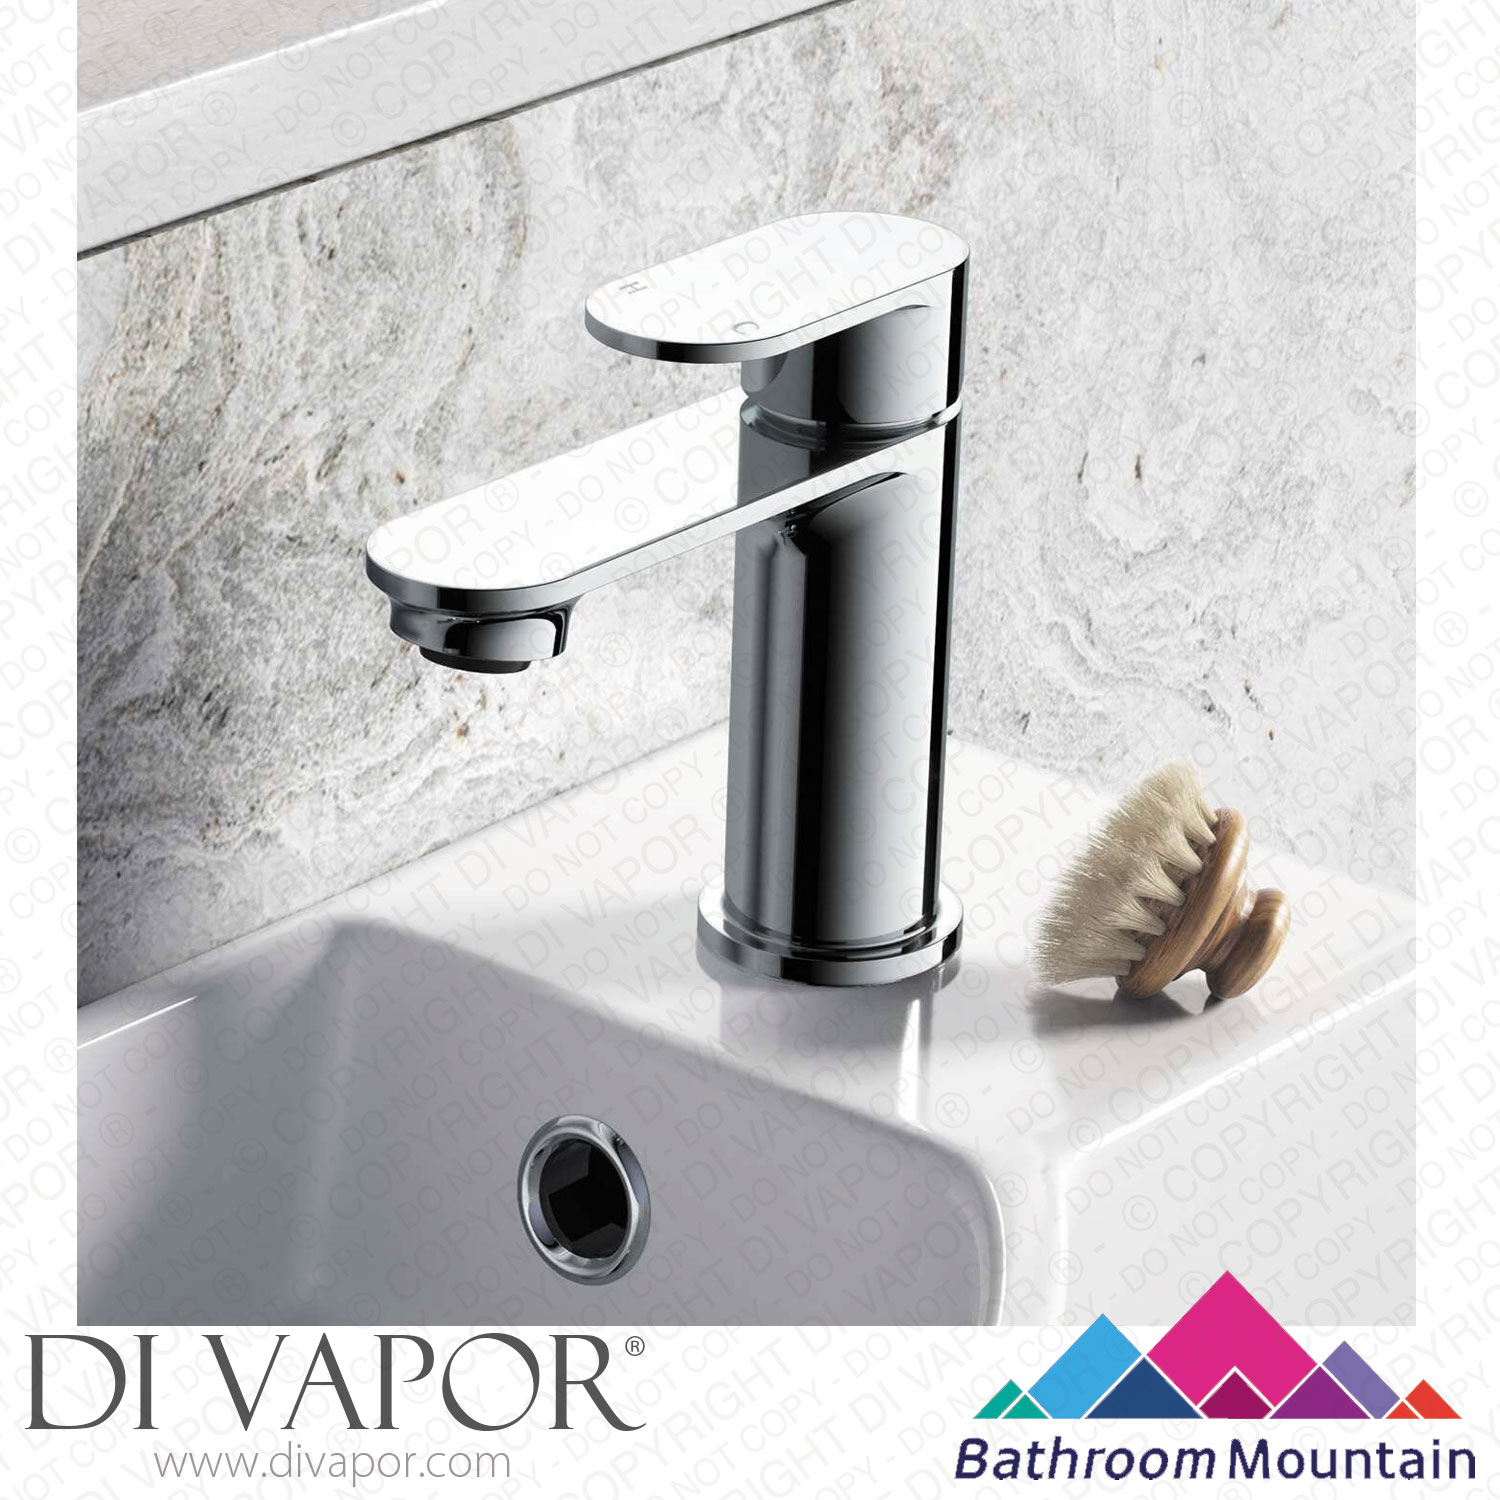
Bathroom taps are fixtures that manage water flow and temperature through internal valve mechanisms. The design defines how changing bathroom taps functions during removal and installation because valve type, connector shape, and sealing surfaces influence alignment, tightening, and overall stability.
Most fixtures use a solid brass body with a ceramic cartridge or spindle to control movement. Flow shaping comes from an aerator, and secure attachment comes from threaded connectors that link directly to the supply pipes. These components regulate pressure, maintain consistent operation, and support reliable sealing when changing bathroom taps during upgrades or repairs.
Additional factors such as basin clearance, access beneath the sink, isolation valve placement and fixing-bracket geometry influence how straightforward changing bathroom taps becomes during practical work.

What Factors Determine How Easy Changing Bathroom Taps Is?
Changing bathroom taps is determined by access space, connector layout, valve design, fixing hardware and basin structure. These determinants influence removal force, alignment accuracy, sealing performance and overall installation time.
Access Space and Changing Bathroom Taps
Restricted space beneath a basin increases the difficulty of changing bathroom taps because tightening angles and hand clearance narrow significantly. Compression joints, backnuts and washers require deliberate positioning, and reduced movement range increases sealing-error frequency.
Connector Layout and Changing Bathroom Taps
Thread size, tail spacing and compression-joint alignment shape the connection process during changing bathroom taps. Larger threads demand stronger stabilisation during tightening, and compact spacing limits tool orientation, which elevates sealing-failure risk.
Valve Design and Changing Bathroom Taps
Cartridge or spindle mechanisms influence handling stability during changing bathroom taps by altering movement control during removal and reconnection. Cartridge systems guide consistent alignment paths, and spindle mechanisms require precise torque application to maintain uniform sealing pressure.
Fixing Hardware and Changing Bathroom Taps
Brackets, plates and backnuts affect installation strength during changing bathroom taps by regulating mounting tension and rotation resistance. Differences in hardware rigidity change the compression force required to achieve a balanced and watertight seal.
Basin Structure and Changing Bathroom Taps
Tap-hole diameter, surface thickness and platform depth influence alignment accuracy during changing bathroom taps. Larger openings improve guidance, and thicker ceramic or resin bases require longer connectors and greater compression force for dependable sealing.
How Do Tap Types Affect the Difficulty of Replacement?
Changing bathroom taps is influenced by tap design because internal mechanisms, mounting formats and connector structures alter alignment demands, sealing pressure and handling stability. Design variation determines installation accuracy, physical effort and overall replacement efficiency.
Single-Lever Designs and Changing Bathroom Taps
A single-lever format simplifies changing bathroom taps by using one cartridge to manage flow and temperature through a unified movement path. Reduced component count shortens removal, and consistent cartridge travel supports reliable alignment during tightening.
Dual-Handle Designs and Changing Bathroom Taps
A dual-handle format increases operational steps during changing bathroom taps because hot and cold mechanisms require independent disconnection and reconnection. Additional fixing points expand installation duration, and spindle-driven valves require precise torque application to maintain balanced sealing pressure.
Wall-Mounted Designs and Changing Bathroom Taps
A wall-mounted format raises difficulty during changing bathroom taps because concealed pipework restricts access to connectors, brackets and sealing surfaces. Shallow cavities limit tool movement, and fixed pipe alignment reduces adjustment freedom during reinsertion.
Monobloc Designs and Changing Bathroom Taps
A monobloc format compresses the working area during changing bathroom taps because threads, connectors and control components concentrate within a compact central body. Limited spacing restricts tool access, and short tails require accurate compression-joint placement to secure uniform sealing.
Traditional Compression Designs and Changing Bathroom Taps
A compression-based format increases torque demand during changing bathroom taps because washer-driven sealing depends on strong mechanical pressure. Higher tightening force influences stability, and washer degradation requires replacement to maintain dependable sealing integrity.

Which Tools Are Required to Change Bathroom Taps Easily?
Changing bathroom taps requires a basin wrench, adjustable spanners, plumbing tape, isolation-valve keys and sealing washers. These tools support secure disconnection, accurate alignment, controlled tightening and reliable sealing during replacement.
Basin Wrench for Changing Bathroom Taps
A basin wrench provides controlled access to hard-to-reach backnuts during changing bathroom taps. The extended shaft and pivoting head apply rotational force in confined spaces, which supports stable removal beneath basins with narrow clearances.
Adjustable Spanners for Changing Bathroom Taps
Adjustable spanners regulate tightening force during changing bathroom taps by gripping various thread sizes across tap tails and compression fittings. Smooth jaw adjustment supports even pressure distribution, which reduces sealing errors during reconnection.
Plumbing Tape for Changing Bathroom Taps
Plumbing tape reinforces thread sealing during changing bathroom taps by filling micro-gaps along metal connections. Tight wrapping increases compression consistency, which improves leak resistance across threaded joints.
Isolation-Valve Keys for Changing Bathroom Taps
Isolation-valve keys provide controlled shut-off during changing bathroom taps by regulating supply flow at service valves. Mechanical leverage enables precise quarter-turn movement, which prevents unwanted water discharge during disassembly.
Sealing Washers for Changing Bathroom Taps
Sealing washers support watertight performance during changing bathroom taps by creating compressed barriers between connectors and mounting surfaces. Correct washer selection increases sealing stability and reduces long-term leak frequency.
How Long Does Changing Bathroom Taps Normally Take?
Changing bathroom taps normally takes 30 to 60 minutes because removal, alignment, tightening and sealing follow a predictable sequence when access and connectors remain unobstructed. Time variation reflects basin design, tap configuration and pipework condition.
Time Allocation During Changing Bathroom Taps
A 30-minute timeframe applies when clear access, standard connectors and modern cartridges support smooth handling during changing bathroom taps. Straightforward backnut removal, short alignment paths and consistent thread engagement reduce overall duration.
Extended Duration During Changing Bathroom Taps
A 60-minute timeframe applies when restricted space, stiff fittings or aged components increase handling demands during changing bathroom taps. Tight cavities, corroded threads and worn washers extend the period required for controlled tightening and sealing.
Structural Factors Influencing Duration
Basin thickness, tap-hole diameter and platform depth influence the time needed for changing bathroom taps by altering connector reach and tightening angles. Deep mounting surfaces and narrow openings increase adjustment frequency and prolong the process.
Mechanical Factors Influencing Duration
Valve type, fixing hardware and compression-joint position shape task length during changing bathroom taps by modifying torque requirements and alignment precision. Spindle valves, rigid brackets and offset joints increase the number of corrective movements.

How Does Pipework Condition Influence Tap-Replacement Ease?
Changing bathroom taps is influenced by pipework condition because corrosion, rigidity, thread quality and valve responsiveness alter disconnection force, alignment control and sealing stability. Structural variation within pipe systems determines the overall precision and time required for replacement.
Corrosion Levels and Changing Bathroom Taps
Advanced corrosion increases resistance during changing bathroom taps by strengthening metal adhesion across threads and connectors. Elevated friction raises distortion risk during removal and prolongs the controlled force needed to free seized joints.
Pipe Rigidity and Changing Bathroom Taps
High pipe rigidity reduces adjustment flexibility during changing bathroom taps by restricting movement along attachment points. Fixed alignment angles limit connector positioning and increase corrective tightening attempts during installation.
Thread Quality and Changing Bathroom Taps
Deteriorated thread surfaces weaken mechanical engagement during changing bathroom taps by reducing compression accuracy around joints. Inconsistent gripping surfaces elevate leak frequency and require additional tightening cycles to establish stable sealing.
Valve Responsiveness and Changing Bathroom Taps
Aged or stiff service valves complicate changing bathroom taps by hindering precise isolation during preparation. Reduced turning freedom obstructs clean water control and extends the transition between disassembly and reconnection phases.
Mixed-Material Assemblies and Changing Bathroom Taps
Mixed-material assemblies influence replacement ease by combining different flex levels and torque tolerances within the same system. Copper-to-plastic transitions require balanced force distribution to prevent over-compression or inadequate sealing during changing bathroom taps.
How Do Isolation Valves Affect the Ease of Changing Bathroom Taps?
Changing bathroom taps is influenced by isolation-valve performance because shut-off accuracy, mechanical resistance, placement and internal condition determine water control, preparation speed and installation safety. Controlled isolation reduces disruption, prevents discharge and supports stable replacement work.
Shut-Off Accuracy and Changing Bathroom Taps
Reliable shut-off improves changing bathroom taps by delivering complete water isolation at the supply point. Full stoppage eliminates residual flow, protects surrounding surfaces and shortens the preparation phase before disassembly.
Mechanical Resistance and Changing Bathroom Taps
High mechanical resistance complicates changing bathroom taps by demanding greater force to rotate stiff internal components. Increased resistance raises tool dependence, slows operational progression and heightens the chance of stem abrasion.
Placement Geometry and Changing Bathroom Taps
Accessible placement accelerates changing bathroom taps by providing clear visibility and unobstructed hand movement around the valve body. Direct access reduces adjustment delays, simplifies shut-off and supports faster reconnection.
Valve Condition and Changing Bathroom Taps
A well-preserved valve enhances changing bathroom taps by delivering smooth quarter-turn movement and consistent isolation behaviour. Degraded seals or worn stems disrupt controlled rotation and extend the time required to establish dependable water control.
Pressure Stability and Changing Bathroom Taps
Stable internal pressure improves changing bathroom taps by minimising vibration and turbulence within the supply line during disassembly. Reduced disturbance increases alignment accuracy and strengthens sealing reliability during final tightening.
Are Some Bathroom Basins Easier for Tap Replacement?
Changing bathroom taps is easier on certain basin designs because platform depth, access geometry and tap-hole dimensions regulate alignment space, tool reach and sealing pressure. Structural differences across basin formats directly influence replacement efficiency and accuracy.
Shallow Platforms and Changing Bathroom Taps
A shallow platform supports changing bathroom taps by shortening connector distance between the tap body and the mounting surface. Reduced depth improves alignment control, decreases tightening strain and strengthens sealing consistency during installation.
Wide Tap-Hole Geometry and Changing Bathroom Taps
A wide tap-hole geometry improves changing bathroom taps by providing additional clearance for tails, washers and fixing brackets. Expanded openings reduce binding, enhance tool movement and promote smoother rotational tightening.
Open Underside Access and Changing Bathroom Taps
An open underside accelerates changing bathroom taps by increasing hand clearance and tool manoeuvrability beneath the basin. Increased access improves backnut handling, decreases obstruction frequency and shortens realignment time.
Compact Basin Shapes and Changing Bathroom Taps
A compact basin shape increases replacement difficulty during changing bathroom taps by restricting movement around connectors and fixings. Narrow spaces elevate adjustment interruptions, prolong thread engagement and increase corrective tightening steps.
Thick Material Construction and Changing Bathroom Taps
A thick material construction challenges changing bathroom taps by extending connector reach and raising required compression force. Greater depth demands longer tails, firmer tightening and more precise washer positioning to achieve uniform sealing.

How Do You Change Bathroom Taps Step by Step?
Changing bathroom taps follows a defined sequence of isolation, disconnection, removal, preparation, installation and testing because each stage regulates water control, structural stability and sealing accuracy. A structured workflow increases safety and reduces sealing errors during replacement.
Preparation Before Changing Bathroom Taps
Preparation establishes safe working conditions during changing bathroom taps by organising tools, clearing access and confirming component compatibility. Stable groundwork reduces disruption and supports efficient movement beneath the basin.
The preparation steps for changing bathroom taps are given below:
- Clear storage space beneath the basin to maximise access range
- Position a bucket beneath pipework to collect residual water from supply lines
- Protect surrounding surfaces with cloths to manage splash and debris
- Confirm compatibility between new fittings, basin tap-holes and connector threads
Isolating Water Supply During Changing Bathroom Taps
Water isolation enables controlled replacement during changing bathroom taps by eliminating uncontrolled flow at the supply point. Clean shut-off reduces system pressure and prevents discharge during disassembly.
The isolation steps for changing bathroom taps are given below:
- Turn isolation valves to the closed position on both hot and cold feeds
- Close the main stopcock when local valves are unavailable or inoperative
- Open existing taps fully to release trapped pressure from supply lines
- Allow residual flow to reduce to a drip pattern before beginning disconnection
Disconnecting Pipework During Changing Bathroom Taps
Pipework disconnection separates supply lines from existing fittings during changing bathroom taps by releasing compression joints and threaded connectors. Controlled loosening preserves pipe integrity and prevents thread distortion.
The disconnection steps for changing bathroom taps are given below:
- Loosen compression nuts on hot and cold tails using adjustable spanners
- Support opposing connectors to minimise twisting across rigid pipework
- Capture remaining water in the prepared bucket to maintain workspace cleanliness
- Inspect exposed threads and olives for visible wear or corrosion
Removing Old Fittings During Changing Bathroom Taps
Tap removal clears the basin platform for installation during changing bathroom taps by releasing backnuts and lifting old fittings away. Clean surfaces improve sealing stability for the new assembly.
The removal steps for changing bathroom taps are given below:
- Apply a basin wrench to each backnut beneath the basin
- Loosen securing components until the tap body lifts freely from the surface
- Remove accompanying brackets, washers and seals from the mounting area
- Clean the tap-hole region to remove limescale, old sealant and debris
Preparing New Fittings for Changing Bathroom Taps
Preparation of new fittings ensures correct assembly during changing bathroom taps by positioning washers, seals and plates before installation. Pre-alignment reduces complexity beneath the basin.
The preparation steps for new fittings are given below:
- Attach supplied seals, gaskets and backing plates to the new tap bodies
- Wrap plumbing tape around threaded areas to reinforce sealing capacity
- Compare tail length with basin thickness to verify correct connector reach
- Align spout and handle orientation to match the required final position
Installing New Fittings During Changing Bathroom Taps
Installation secures new assemblies during changing bathroom taps by tightening brackets, aligning bodies and compressing seals. Balanced pressure distribution supports long-term watertight performance.
The installation steps for changing bathroom taps are given below:
- Insert new tap bodies through the basin tap-holes from above
- Position top-side gaskets evenly to prevent distortion under compression
- Fit backnuts and brackets beneath the basin and tighten by hand initially
- Apply gradual wrench tightening while checking alignment from above
Reconnecting Pipework During Changing Bathroom Taps
Reconnection restores supply links during changing bathroom taps by engaging compression joints and threaded connectors. Accurate engagement secures sealing integrity along both feeds.
The reconnection steps for changing bathroom taps are given below:
- Offer compression joints or flexible connectors to the new tails
- Engage threads by hand to prevent cross-threading
- Tighten compression nuts with controlled and progressive force
- Confirm secure fitting across each joint without over-compression
Testing Performance After Changing Bathroom Taps
Testing verifies success during changing bathroom taps by confirming flow stability, sealing strength and operational smoothness. Gradual pressurisation reveals any faults requiring immediate correction.
The testing steps for changing bathroom taps are given below:
- Reopen isolation valves slowly to reintroduce water to the system
- Inspect all connectors beneath the basin for moisture rings or drips
- Test hot and cold flows independently to evaluate pressure and movement
- Apply minor tightening adjustments when seepage appears and retest flow

What Are the Common Problems When Changing Bathroom Taps and How Do You Solve Them?
Changing bathroom taps features recurring problems involving seized fittings, restricted access, thread failure, sealing faults and pipe misalignment because mechanical wear, spatial limits and connector distortion interfere with removal and installation accuracy. Structured corrective actions restore stability and sealing integrity during replacement.
Seized Fittings During Changing Bathroom Taps
Seized fittings create significant resistance during changing bathroom taps because corrosion layers, hardened limescale and compressed threads obstruct rotation.
The solutions for seized fittings are given below:
- Apply penetrating oil to weaken corrosion bonds around metal joints
- Increase leverage with a basin wrench inside confined cavities
- Support rigid pipework to prevent rotational distortion
- Clean mounting zones after removal to reduce future binding
Restricted Underside Access During Changing Bathroom Taps
Restricted underside access slows changing bathroom taps because narrow cavities limit tool mobility and reduce tightening angles.
The solutions for restricted underside access are given below:
- Remove obstructive panels or storage units to expand working space
- Use extended-shaft wrenches to reach recessed backnuts
- Adjust spanner positioning to create controlled micro-rotations
- Improve directional lighting to guide alignment and tightening sequences
Thread Failure During Changing Bathroom Taps
Thread failure disrupts installation during changing bathroom taps because worn, flattened or cross-threaded surfaces reduce connector engagement.
The solutions for thread failure are given below:
- Inspect tails and connectors for visible deformation before refitting
- Replace compromised olives or fittings to restore structural grip
- Apply plumbing tape to rebuild minor imperfections across metal threads
- Realign connectors carefully to prevent renewed cross-threading
Sealing Faults During Changing Bathroom Taps
Sealing faults generate leaks during changing bathroom taps because uneven washer compression and misaligned joints reduce surface contact.
The solutions for sealing faults are given below:
- Install new washers and seals to re-establish uniform pressure distribution
- Tighten compression joints progressively to balance sealing strength
- Remove debris from tap-hole surfaces to prevent micro-gaps
- Adjust connector positions to improve sealing alignment around contact points
Pipe Misalignment During Changing Bathroom Taps
Pipe misalignment complicates changing bathroom taps because rigid pipe geometry restricts connector orientation and disrupts tightening pathways.
The solutions for pipe misalignment are given below:
- Use flexible connectors to compensate for offset alignment
- Stabilise rigid pipe sections during tightening to reduce torsional strain
- Adjust tap-body angle before final compression to improve connector reach
- Evaluate basin platform depth to confirm adequate thread exposure
How Do You Choose the Right Replacement Taps for Easy Installation?
Choosing the right replacement taps for easy installation depends on tap-hole spacing, platform depth, connector format, valve structure and fixing design because structural alignment and mechanical behaviour determine the efficiency of changing bathroom taps. Accurate specification reduces alignment errors and strengthens sealing performance.
Tap-Hole Spacing for Changing Bathroom Taps
Correct spacing supports easy installation during changing bathroom taps by aligning new fittings with existing basin holes. Matched centres reduce lateral tension, prevent twisting and create a stable mounting position for tightening.
Platform Depth for Changing Bathroom Taps
Appropriate platform depth improves changing bathroom taps by matching tail length to basin thickness. Balanced depth strengthens washer compression, regulates sealing pressure and reduces over-extension across the mounting surface.
Connector Format for Changing Bathroom Taps
Compatible connector format accelerates changing bathroom taps by matching thread dimensions, compression-joint designs and tail lengths to existing pipework. Accurate compatibility decreases adjustment frequency and prevents cross-threading.
Valve Structure for Changing Bathroom Taps
Suitable valve structure influences changing bathroom taps by shaping movement stability during operation. Cartridge systems deliver consistent travel paths, and spindle formats require controlled torque distribution; correct structure enhances alignment accuracy.
Fixing Design for Changing Bathroom Taps
Appropriate fixing design stabilises installation during changing bathroom taps by controlling mounting tension and body rigidity. Brackets and backnuts with balanced stiffness maintain alignment and reduce rotational drift during tightening.
Durability Factors for Changing Bathroom Taps
Durable construction supports long-term installation quality during changing bathroom taps by reducing future resistance during removal. Corrosion-resistant tails, long-life cartridges and robust seals minimise degradation and preserve structural integrity.
Frequently Asked Questions About Changing Bathroom Taps
How Difficult Is Changing Bathroom Taps?
Changing bathroom taps becomes straightforward when access space, connector compatibility, valve structure and pipework condition support stable handling. Clear alignment paths, clean threads and responsive isolation enhance installation control and reduce resistance during replacement.
Do All Basins Support Easy Changing of Bathroom Taps?
Changing bathroom taps is easier on basins with wide tap-holes, open underside cavities and shallow platforms. Expanded clearance improves tool movement, accelerates backnut removal and strengthens alignment accuracy.
Are Special Tools Required for Changing Bathroom Taps?
Changing bathroom taps requires a basin wrench, adjustable spanners, plumbing tape, isolation-valve keys and sealing washers because controlled torque, clean threading and stable compression determine sealing reliability. Correct tools improve precision and reduce thread damage.
What Causes Leaks After Changing Bathroom Taps?
Leaks after changing bathroom taps occur when washers compress unevenly, connectors misalign or threads deteriorate. Balanced tightening, clean mounting surfaces and correct compression-joint engagement restore sealing stability.
How Long Does Changing Bathroom Taps Take?
Changing bathroom taps takes 30 to 60 minutes because cavity size, corrosion levels and alignment requirements influence removal and installation speed. Wider access, clean fittings and consistent surfaces reduce overall duration.
What Cost Range Applies to Changing Bathroom Taps?
Changing bathroom taps costs £40 to £120 because labour intensity increases when corroded fittings, rigid pipework or compact cavities require additional handling. Straightforward access lowers service cost, while complex alignment increases labour pricing.
Can Flexible Connectors Improve Changing Bathroom Taps?
Flexible connectors improve changing bathroom taps by compensating for pipe misalignment and rigid angle constraints. Controlled flexibility supports clean engagement between tap tails and supply lines.
What Tap Features Simplify Changing Bathroom Taps?
Matched spacing, appropriate tail length, compatible connectors, stable cartridges and balanced fixing designs simplify changing bathroom taps. Correct specification reduces tightening errors and strengthens long-term sealing quality.
Conclusion
Changing bathroom taps achieves reliable results when basin access, connector format, valve structure and pipework condition support controlled removal, accurate alignment and stable sealing. Mechanical clarity across these elements defines installation efficiency and reduces corrective intervention during replacement.
Structural factors such as tap-hole spacing, platform depth, underside clearance and fixing rigidity influence tightening accuracy and sealing pressure during changing bathroom taps. Mechanical factors such as thread condition, compression-joint quality and isolation-valve responsiveness shape disconnection force and reconnection stability.
Successful changing of bathroom taps relies on organised preparation, correct tool selection, progressive tightening, clean sealing surfaces and compatible replacement fittings. Consistent performance emerges when structural alignment, mechanical condition and controlled workflow combine to stabilise each installation stage.


