
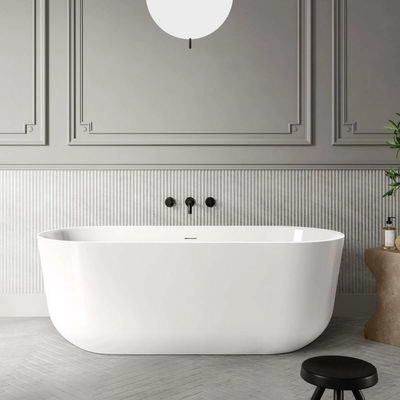
As anyone fortunate enough to own a standalone tub knows, these beautiful fixtures often serve as the grand focal point of any interior. Whether the style is modern, traditional, or transitional, your bathroom is elevated by the presence of its elegant, standalone centerpiece. These stunning models command attention, transforming the surrounding space with a magnificent effect.
However, even the most splendid fixture can start to feel a little dull over time. If you are updating your bathroom’s design, you don’t want your once-proud tub to look drab and forgotten in a basic, matte-white finish. To avoid this, you have two main options: purchase a completely new bathtub, or revitalize your existing one with a fresh coat of color. From serene blues to rich golds to bold, sultry reds, your tub can be any color you desire!
Can I Truly Paint My Own Bathtub?
Yes, you can! Even if you are not undertaking a full renovation, simply recoloring your tub’s exterior is a fantastic way to introduce new life and color to your space. While it might seem like a formidable task, especially if you are new to DIY, all it requires is the correct supplies, a little knowledge, and some commitment. We will guide you through the process step-by-step, covering everything from necessary equipment to painting technique and aftercare. Let’s get started!
What Equipment Do I Need?
Paint
The type of paint is critical. Whether you are working with a polymer/acrylic tub (most common) or an enameled cast-metal tub (less common), you must choose a suitable product. Standard latex paint will not work, as it lacks the toughness and water-resistant qualities required for a bathroom environment.
- For Polymer/Acrylic Tubs: An acrylic polymer paint is recommended, particularly a one- or two-part epoxy paint. These products offer excellent adhesion, a smooth finish, and superior durability.
- For Cast-Metal Tubs: Epoxy paints also work well, as does polyurethane paint.
Many tub-specific painting kits are available that include the required paint, primer, and thinner. Before proceeding, always contact the manufacturer of your bathtub to verify that your chosen paint is suitable for that model. This prevents damage, integrity issues, or voiding the warranty.
Primer
A primer, or undercoat, is necessary for both polymer and metal tubs. Polymer surfaces are notoriously difficult to bond with, and a plastic-specific primer will enhance adhesion and reduce the number of paint layers needed. For cast-metal tubs, an oil-based primer formulated for metal is the best choice.
Brush, Roller, or Spray Gun?
Your choice of application tool depends on your budget versus your desired finish:
- Spray Gun: Provides the highest quality, factory-level finish with the least amount of effort. However, spray guns are expensive and notoriously messy, requiring extensive covering and masking of your entire bathroom to protect surrounding surfaces.
- Brushes and Rollers: Far cheaper and less messy. They result in slower work and may not yield a perfect factory finish, but you can get very close if you work carefully. If using this route, a foam roller or a smaller paintbrush is best for thin, even coats without leaving heavy lines.
Sandpaper
You will need both medium-rough and superfine sandpaper for different stages of the process. Painting a standalone tub requires nearly as much sanding as it does painting.
Safety Gear and Bathroom Protection
Any paints and primers contain chemicals. You must protect yourself: a functioning face mask, sturdy gloves, and eye goggles are essential. Ensure your bathroom is well-ventilated (open windows or run a fan) and keep children and pets out of the room.
To protect your bathroom surfaces, you will need ample masking tape and materials like old newspaper, drop cloths, or old sheets to cover everything you do not want painted.

Painting Your Bathtub: A Step-by-Step Guide
Once your equipment is ready, the room is prepped, and ventilation is running, it’s time to begin!
Step 1: Prepare Your Space
Cover every surface in your bathroom with newspaper or sheets to protect against splatter. If your tub has decorative features like feet or a roll rim, tape these off so you can address them separately if needed. Verify that all your safety and painting equipment is functioning properly.
Step 2: Cleaning, Rust Removal, and Sanding (Keying)
Never paint a dirty tub. Any remaining grime will compromise the final finish.
- Clean: Thoroughly clean the entire exterior surface of the tub and dry it completely.
- Rust Removal (Cast Metal Only): If you have a cast-metal tub, use mineral spirits and an old cloth to remove any traces of rust before sanding.
- Sanding (“Keying”): You must sand the exterior to create a slightly porous surface, allowing the primer and paint to adhere better. Use medium-rough sandpaper until the surface feels rough to the touch. This step requires effort but ensures a professional, long-lasting finish.
- Final Clean: Once sufficiently keyed, clean the tub again to remove all sanding grit and dust. Once it is spotless and dry, you are ready for the primer.
Step 3: Primer Application
Apply at least one coat of primer to the entire exterior. The primer provides the necessary adhesion for a resilient finish. Use the primer appropriate for your tub material (plastic-specific or metal-specific). Apply two or three thin, even layers, taking care to avoid drips, as primer drips will be visible through the topcoat.
Step 4: Paint, Sand, Paint, Repeat!
With the groundwork laid, it’s time for the color. For a professional result, aim for at least two thin layers:
- First Coat: Apply the first layer thinly. If using a brush or roller, apply in varying directions to ensure even coverage and avoid heavy lines.
- Sanding: Once the first coat is dry, use your superfine sandpaper to gently remove any visible brush marks or streaks.
- Second Coat: Apply the next thin layer of paint. Assess the coverage. If a flawless finish is desired, sand again, and apply a third thin coat. Do not sand after the final layer.
Step 5: Allow Ample Drying Time
Now for the easiest part: leaving the tub alone for at least 48 hours to allow the paint to fully cure and dry. After this time, you may consider applying a coat of oil- or water-based matte varnish to seal the paint and add protection. Always check with both the tub manufacturer and the paint manufacturer before applying any sealant, as not all sealants are safe for polymer surfaces.
Your standalone tub is now transformed into a gleaming beacon of custom color!
Step 6: Aftercare
If you used high-quality materials and worked carefully, you should not experience peeling or flaking. However, you must be cautious during cleaning. Do not scrub aggressively, and avoid any cleaning products containing harsh, chemical paint strippers. Opt for gentle, paint-friendly cleaning products and soft cloths or sponges. A simple, effective option is a paste of baking soda and white vinegar, which cleans grime without damaging the paint finish.


